Make Your Own Witch Pumpkin
This post may contain affiliate links. Please read my privacy policy.
This post for making your own witch pumpkin originally appeared over at See Vanessa Craft as part of her 20 Crafty Days of Halloween.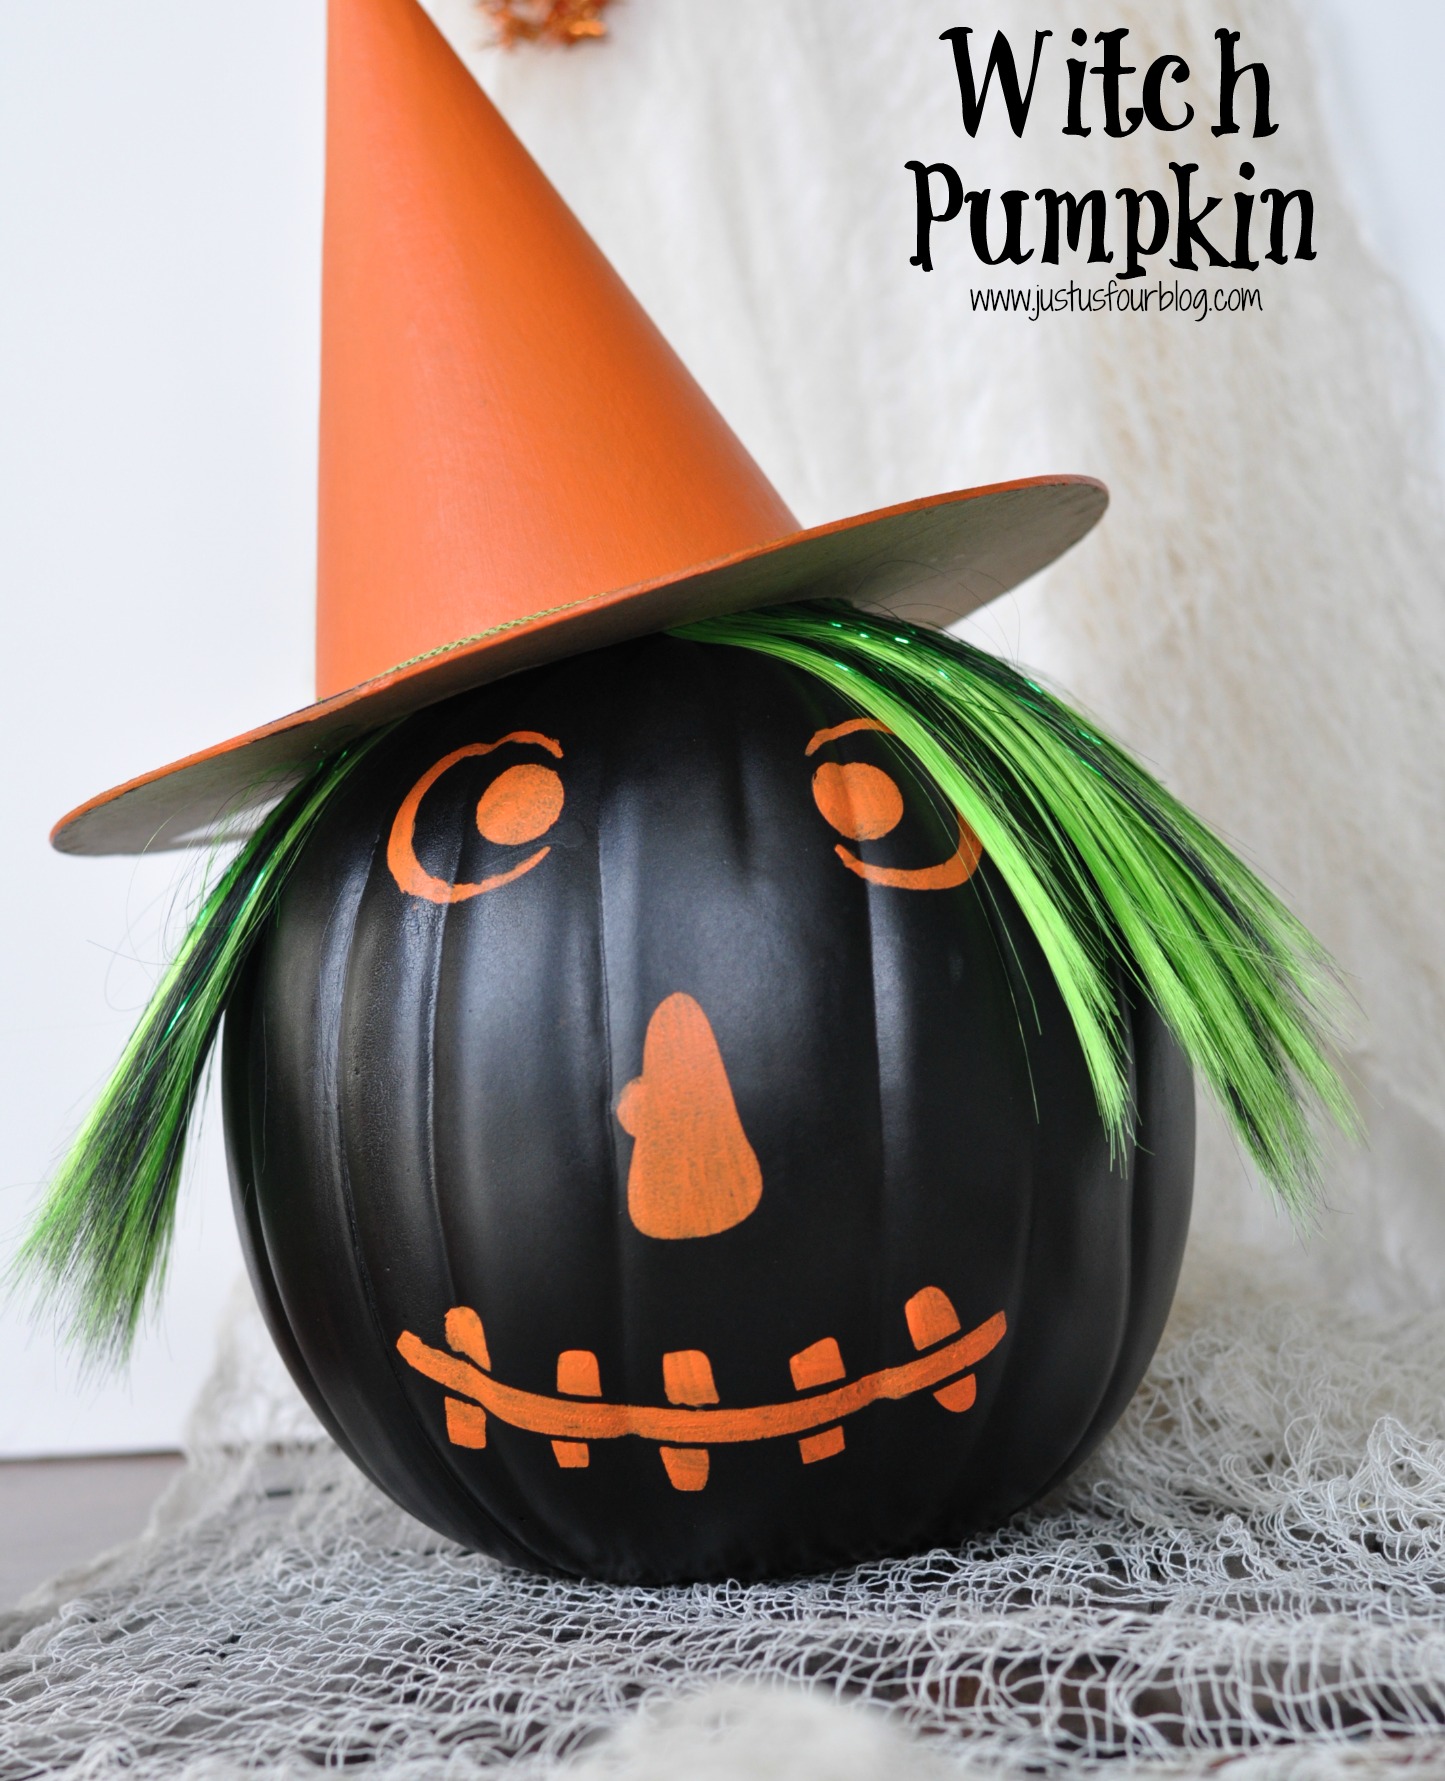
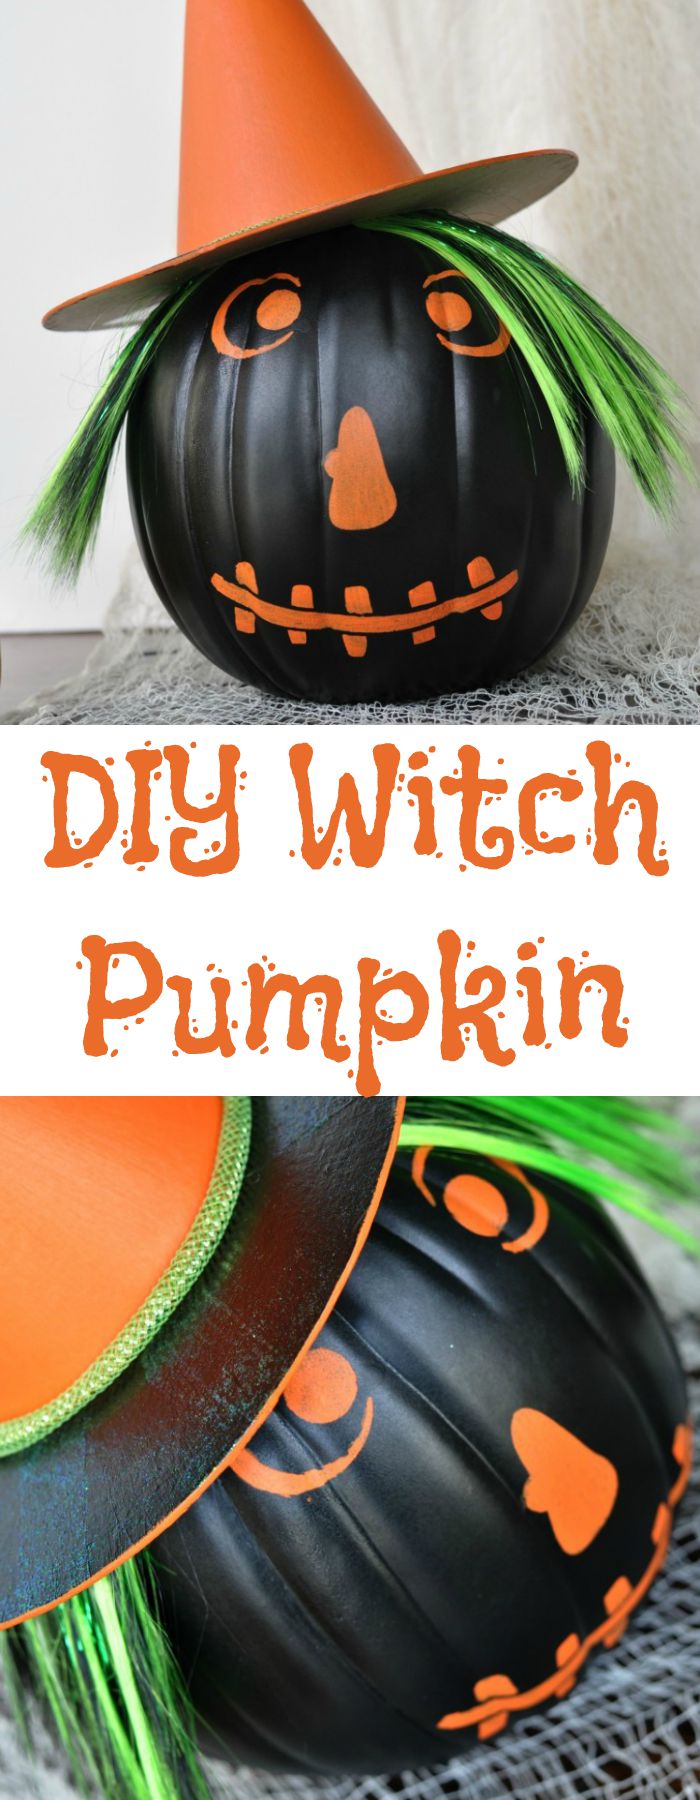
Ever since I had my two children, Halloween has become one of my absolute favorite holidays. I love to incorporate crafts and activities into our holiday preparations, like these stenciled trick or treat bags, that I can get my kids involved in or that I know they will love. This witch pumpkin is definitely one of those things because, while I did most of the painting, I let them direct what I painted!
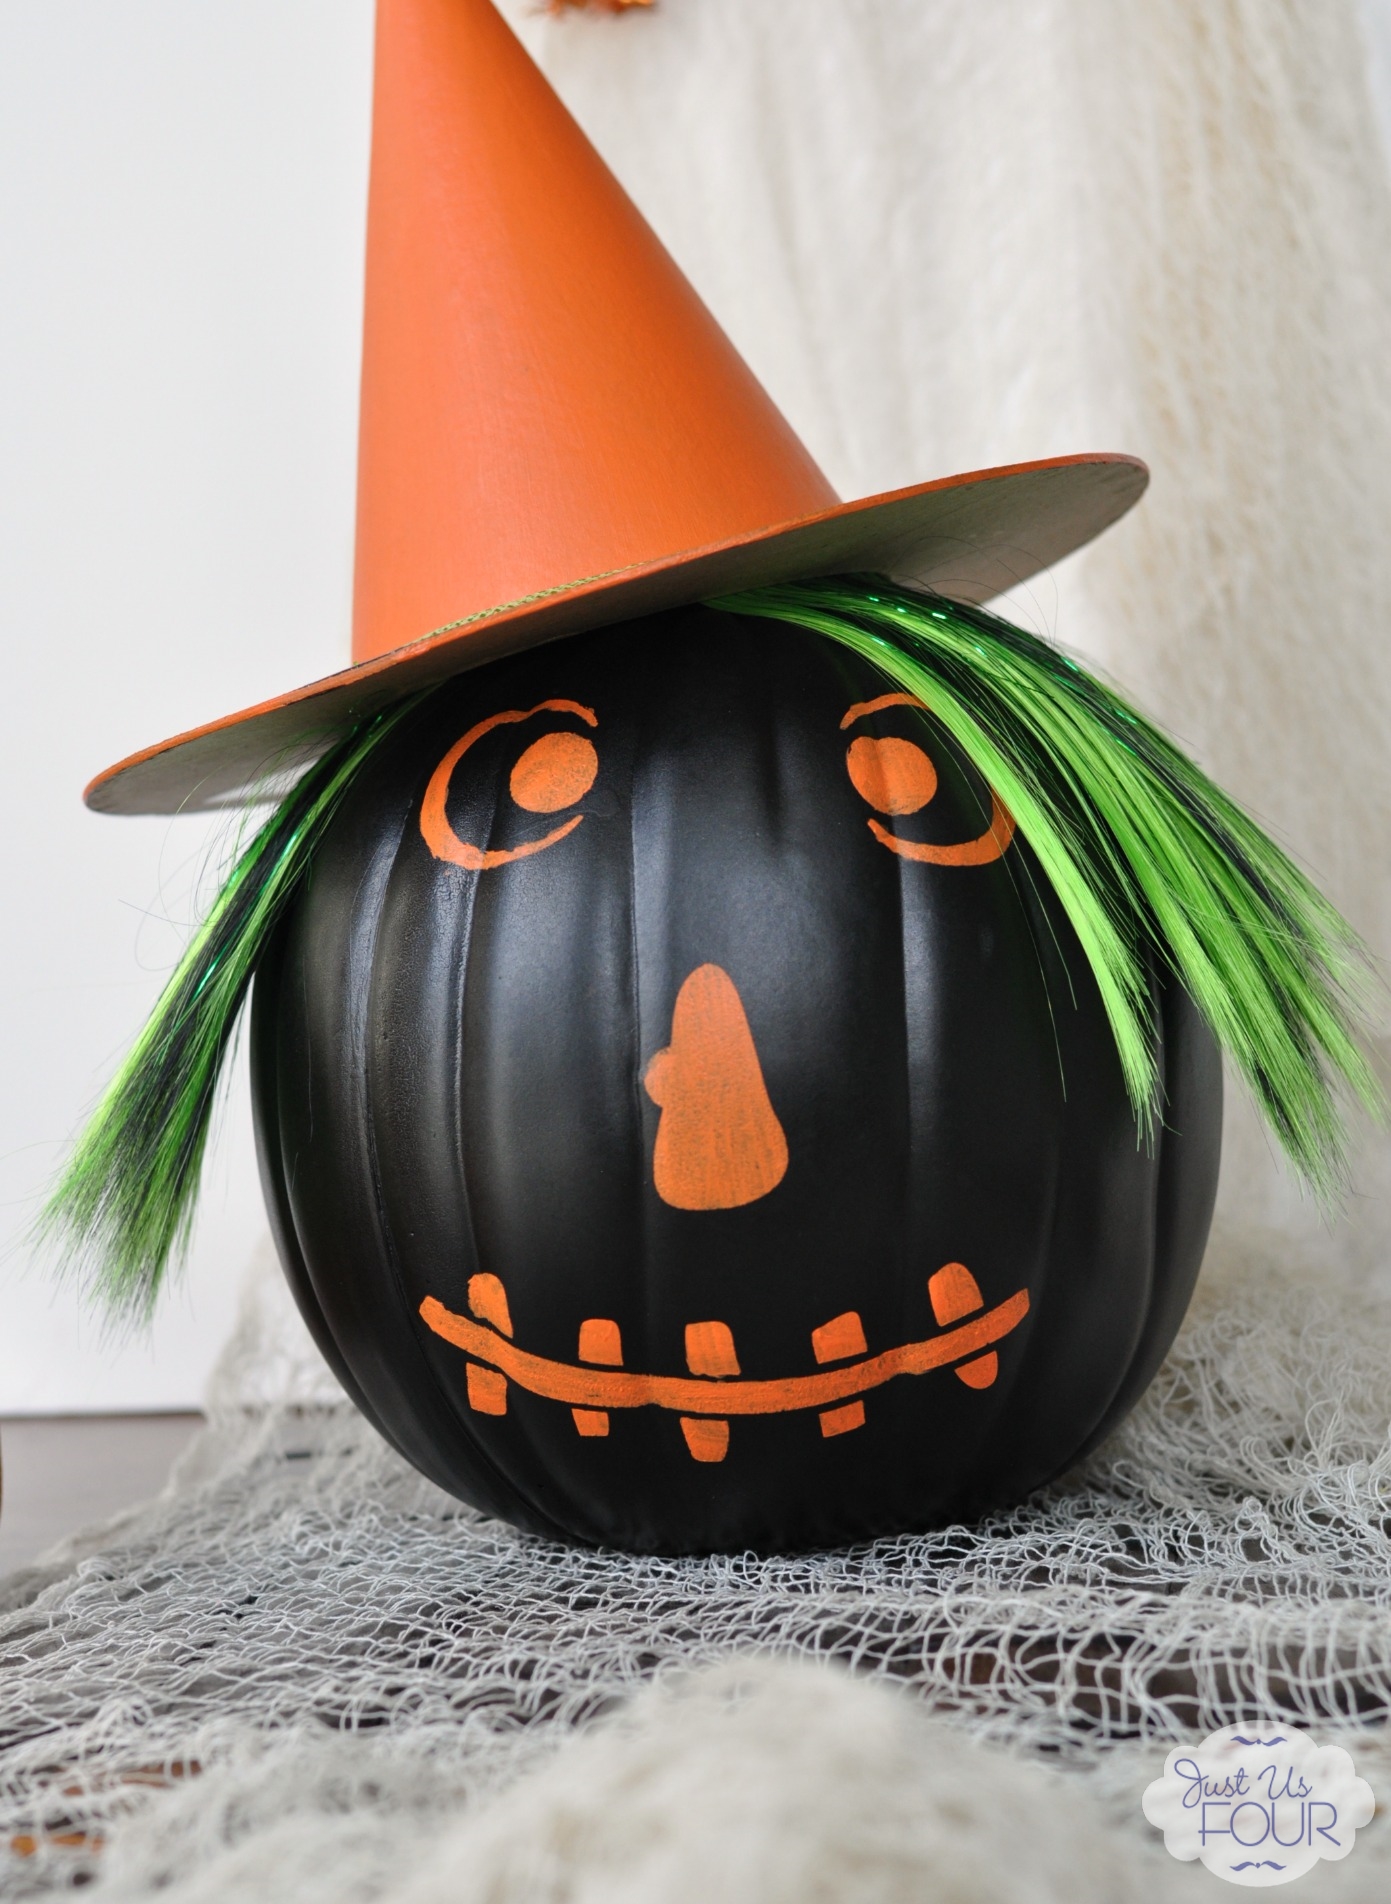
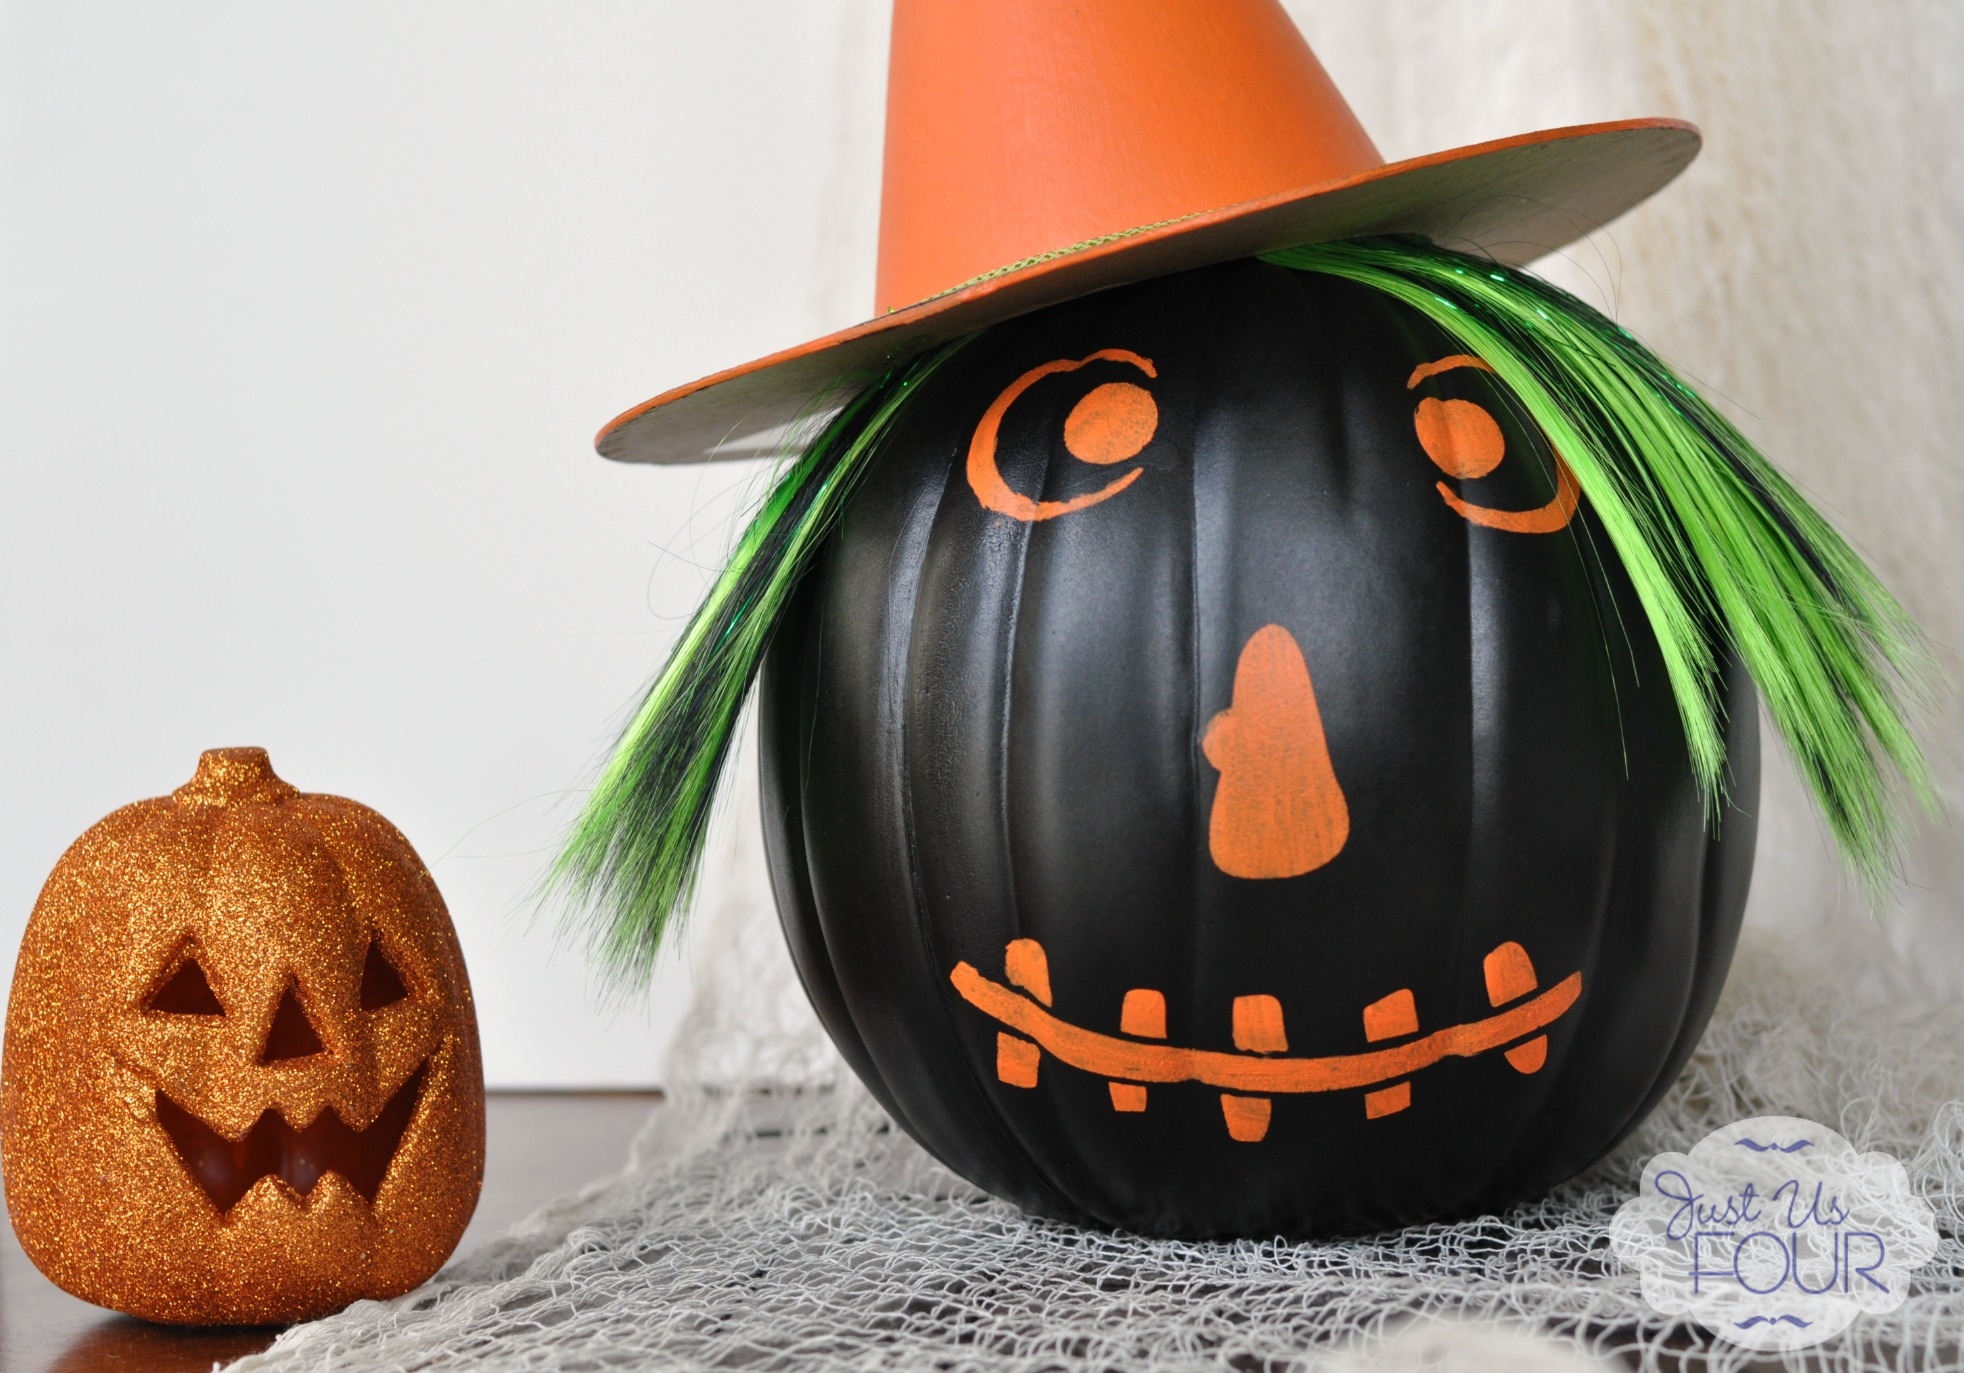
We started with two basic items to get started: a pumpkin and a hat.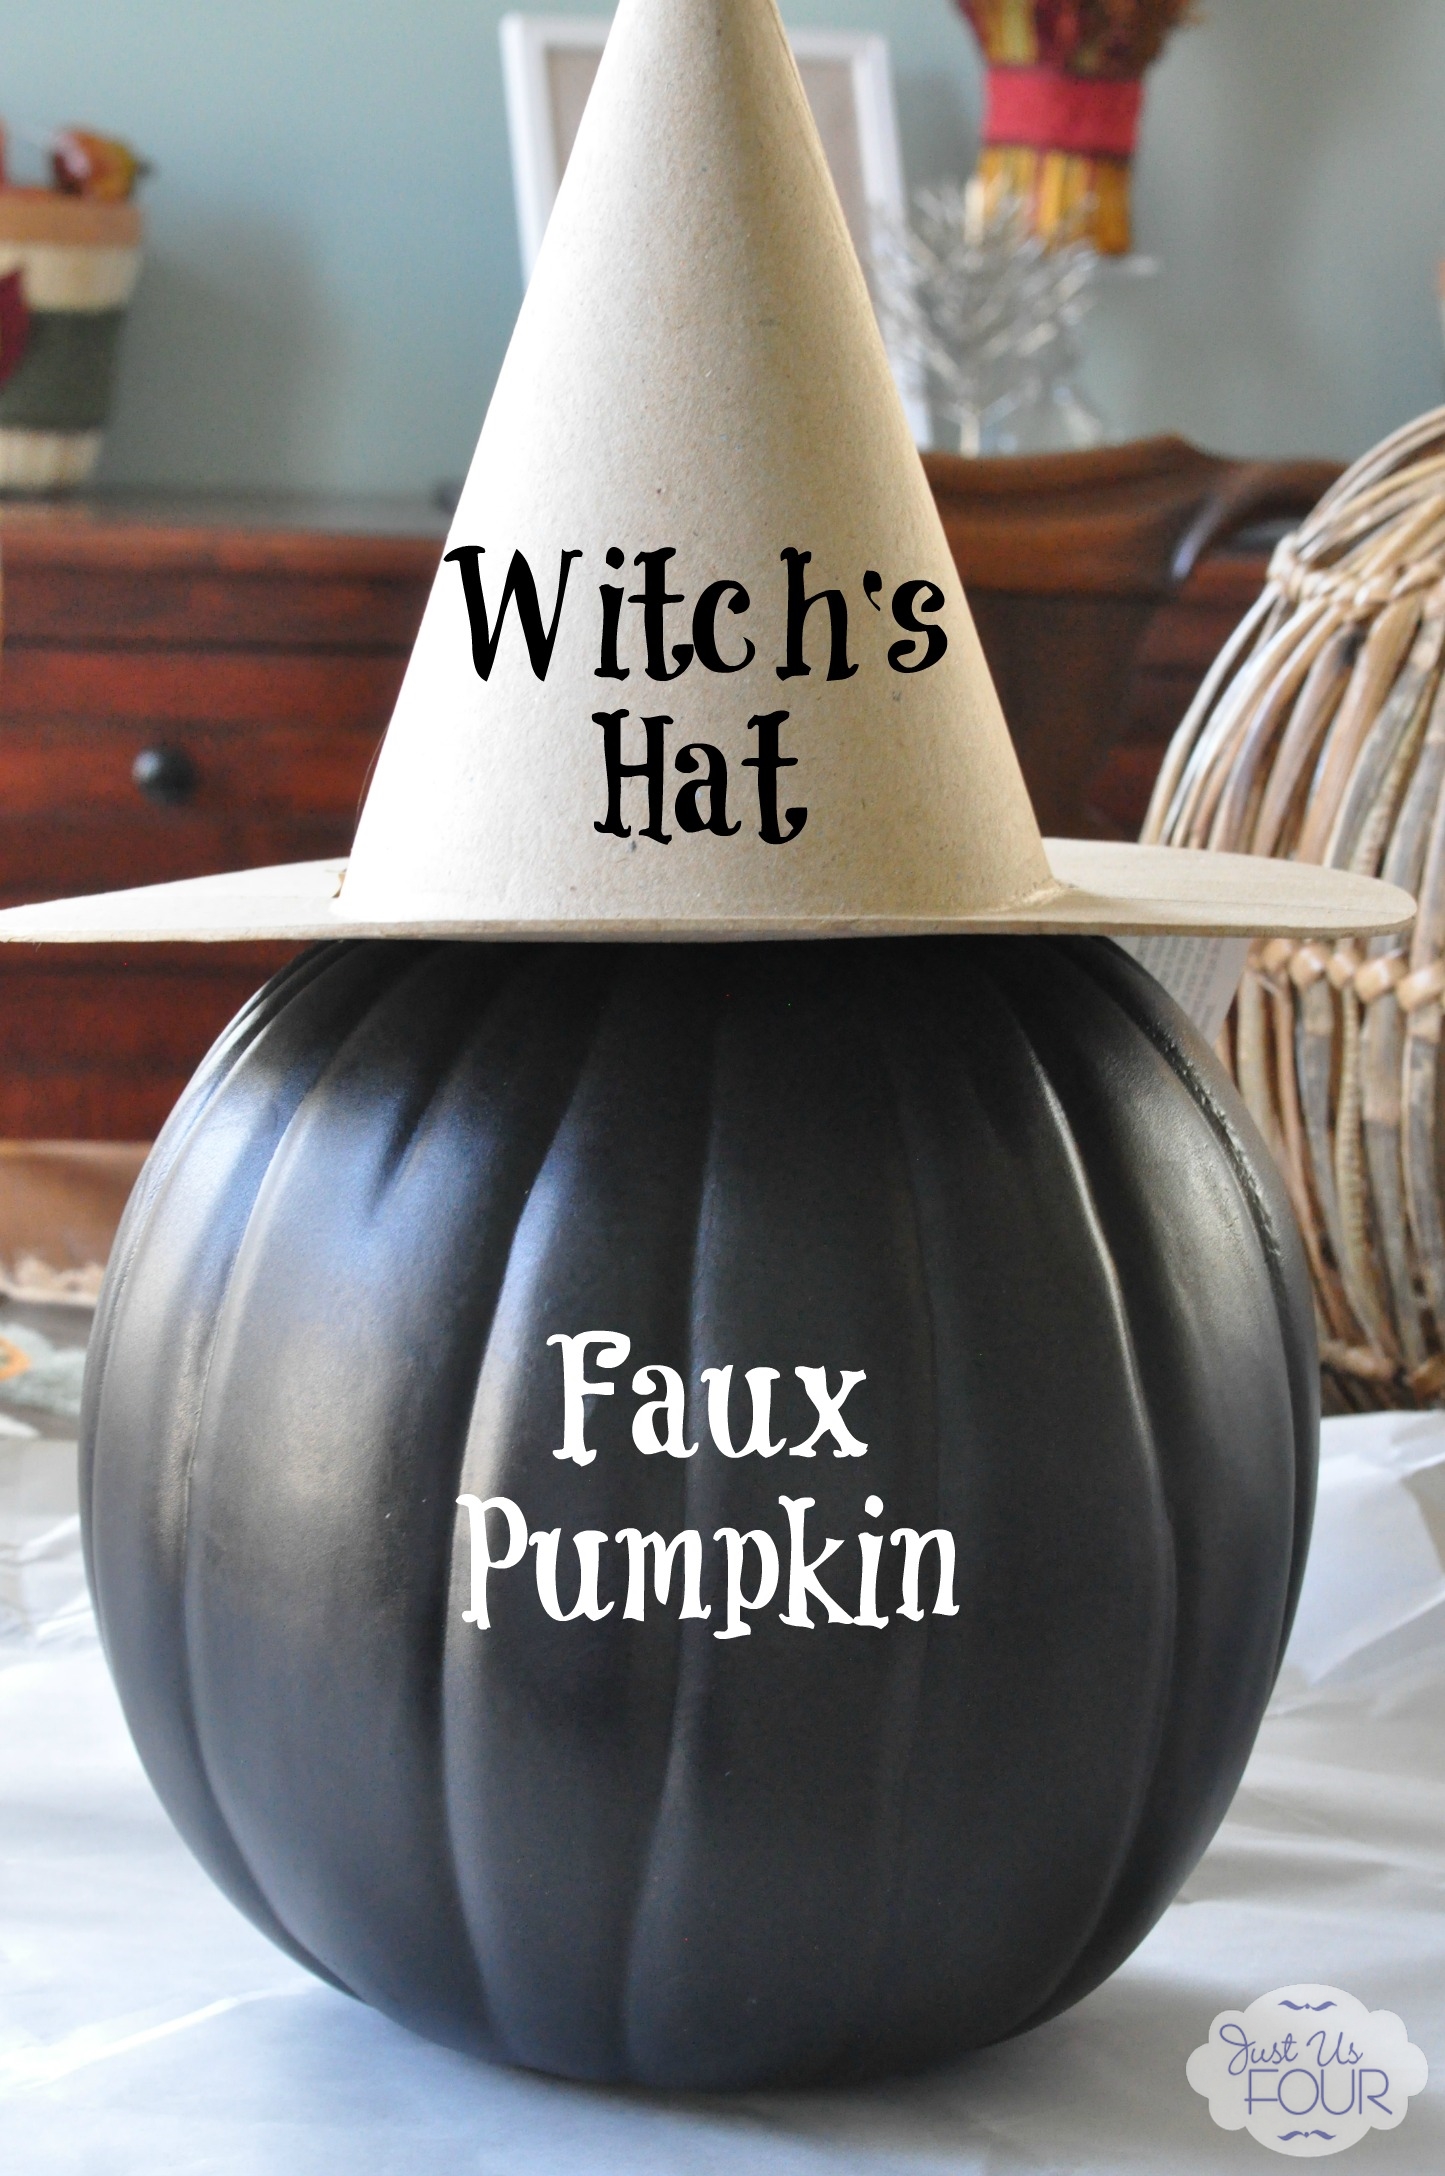
My daughter chose the paint carefully and ended up with black and orange in both satin and glitter finishes.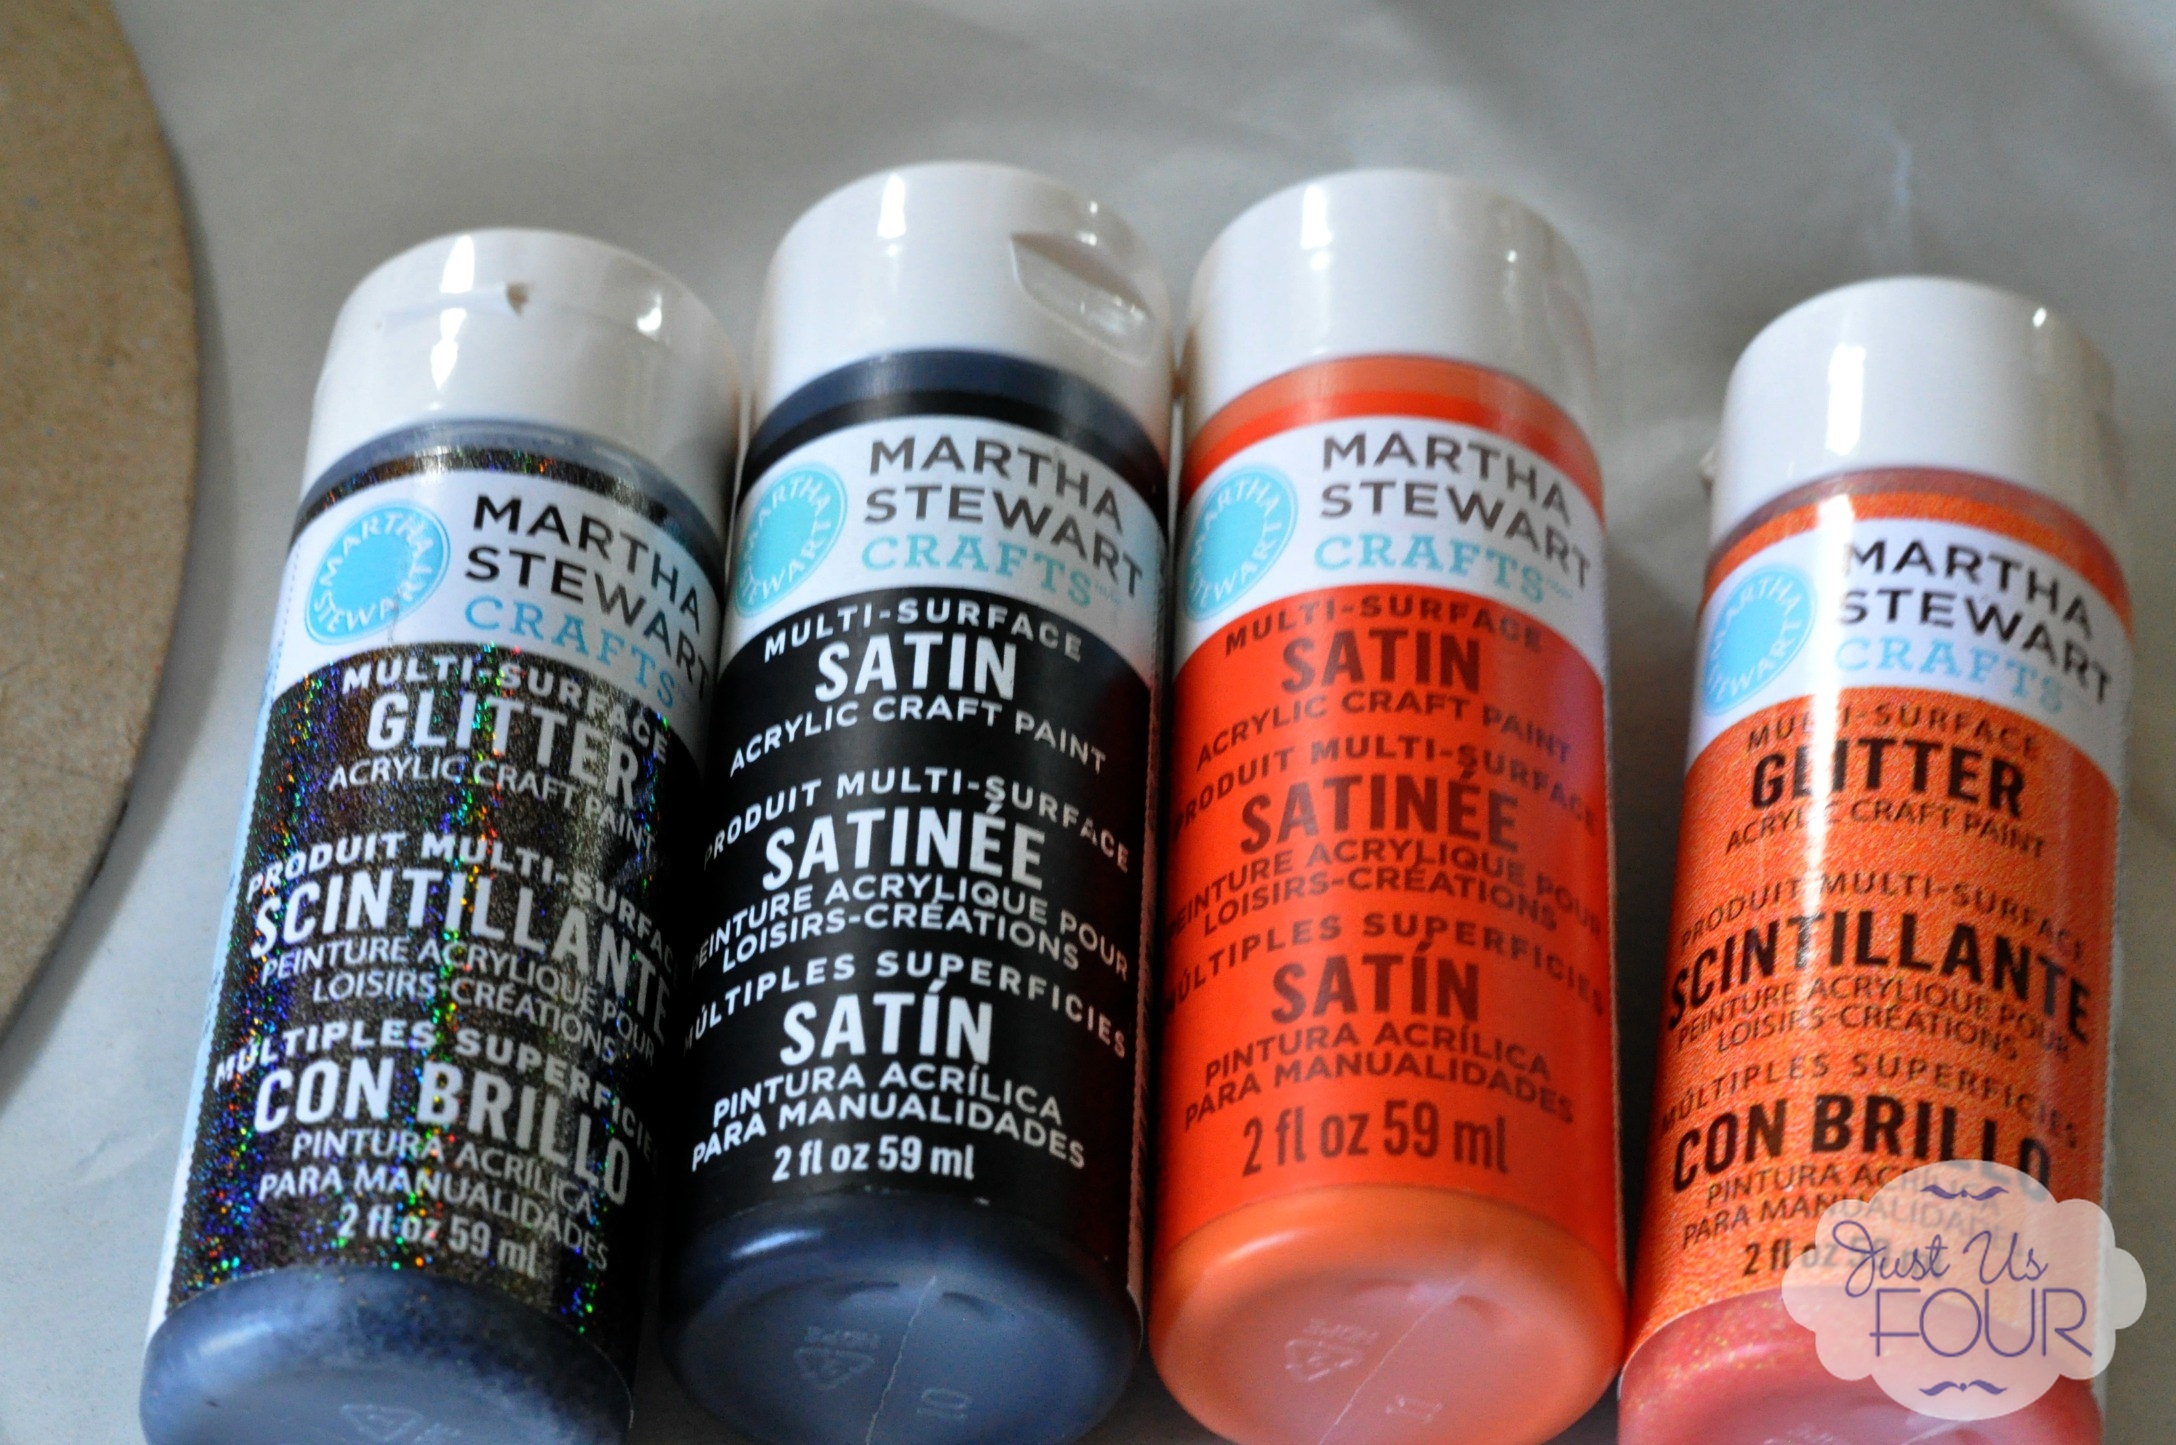
We painted the witch hat in the satin paint first…black on the rim and orange on the peak.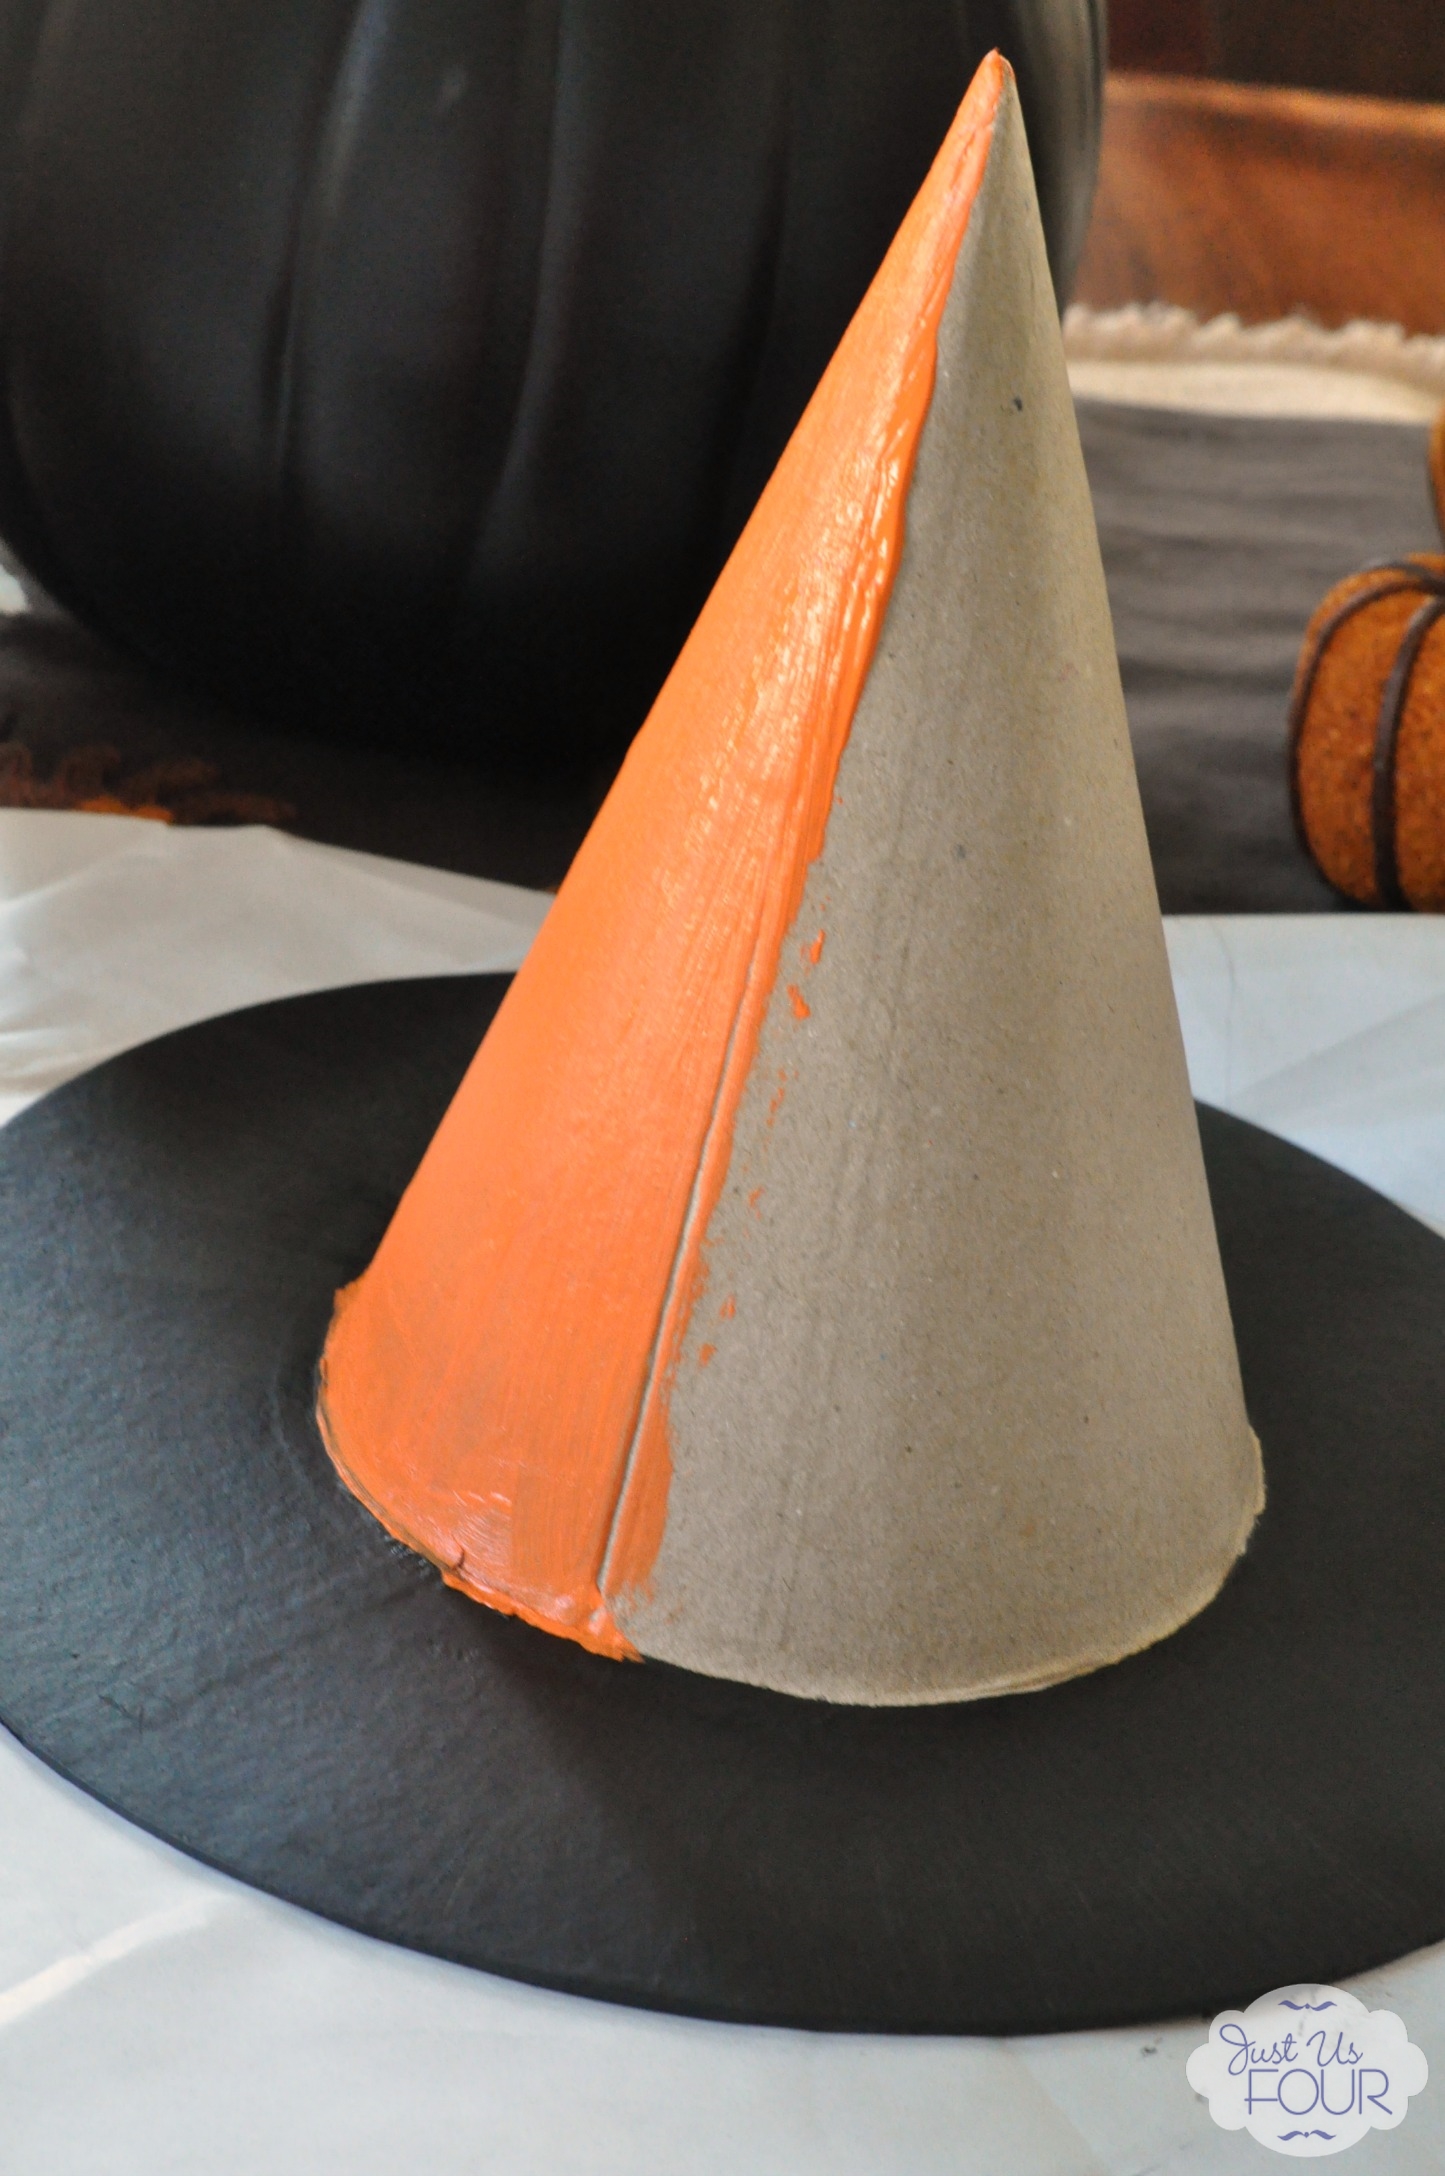
Then, we added glitter to the rim for a fun little touch. Originally, the glitter started in striped but quickly changed to the rim of the hat being covered in glitter.
The face was created using some Martha Stewart adhesive stencils and paint. The adhesive stencils are perfect for round objects like the pumpkin.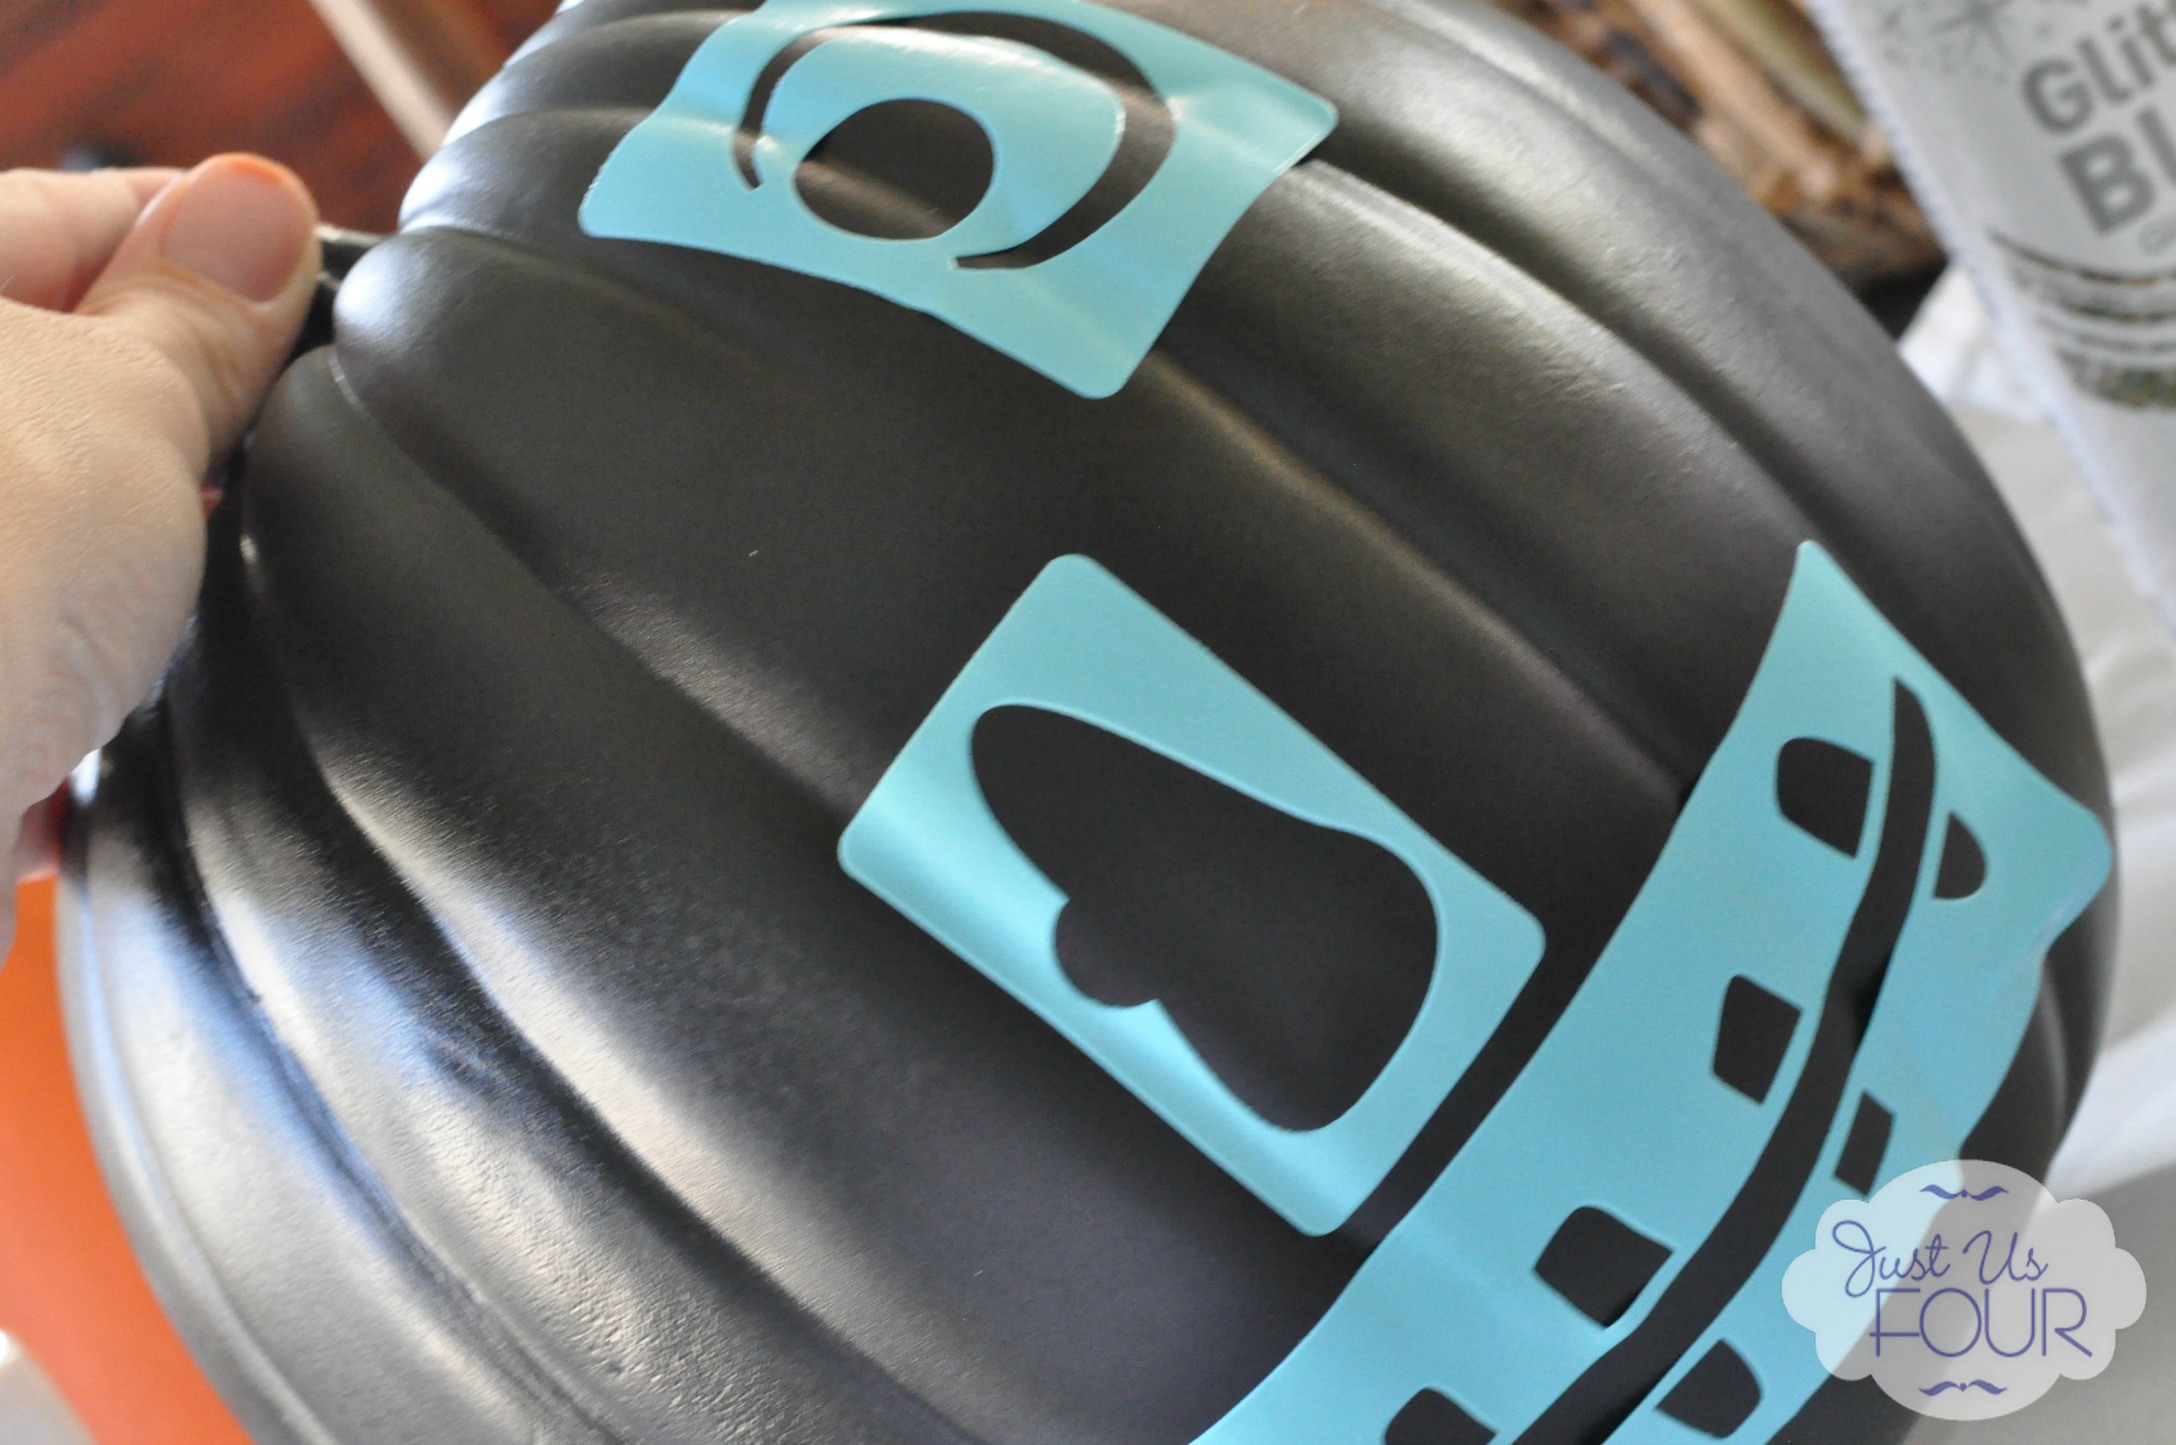
While our paint dried, we brainstormed on what to use for the witch’s hair. My daughter had a little hair clip she used last Halloween so we just clipped that to the stem of the pumpkin. We placed the finished hat on top and our witch was done.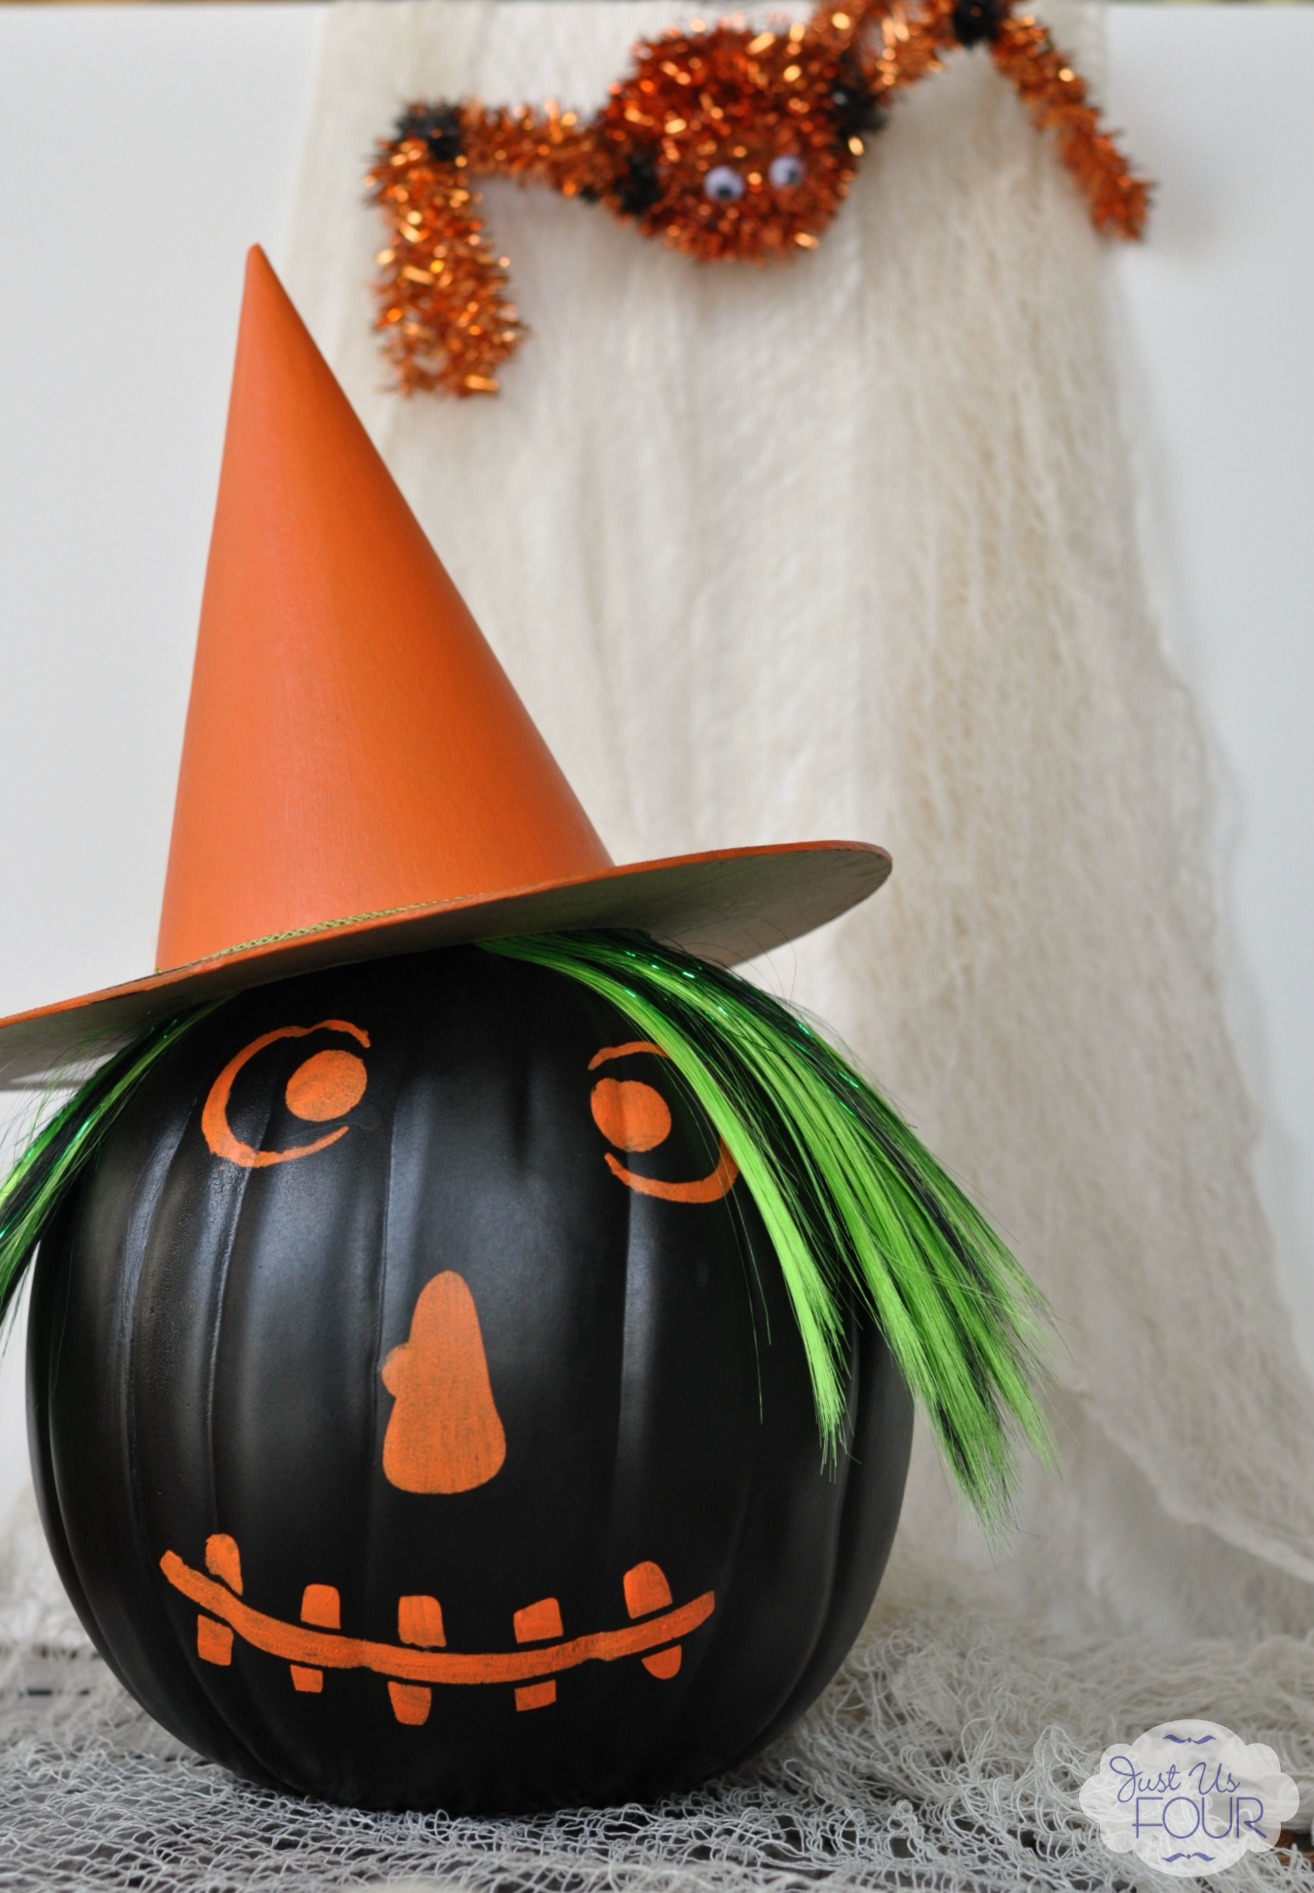

Be sure to go visit Vanessa over on her blog to see the awesome stuff she shares along with the other projects from the 20 Crafty days of Halloween.