This post may contain affiliate links. Please read my privacy policy.
Do you love thrifting? I do even though I don’t always have the time to go as much as I love. Today, Rachel is sharing some great tips on how to clean up thrift store furniture without any power tools!
***************************************************
Hello all! My name is Rachel and I blog about recipes, crafts, DIY and parenting a five-year-old and two-year-old twins over at
Architecture of a Mom.

Today, I’m going to share with you how easy it is to fix up thrift store furniture finds!
Are you afraid to buy furniture at thrift stores because you don’t want to go to the trouble of fixing the furniture up? Are you leery of power tools? Well, fear not! You can easily fix up wooden thrift store furniture with only household items–no big tools needed.
On my recent trip to the beach, I stumbled across this modern looking table. It was marked as $5, but the awesome part was that it was the day after Independence Day and they were having a huge inventory reduction sale—everything in the store was half off! The only down side? It had candle wax all over the top of the table. I guess someone had either spilled wax on it, or used it as a platform for a bunch of pillar candles. Bummer. But for $2.50, I figured that I could risk it and best case scenario I had an awesome new table for almost nothing! There are only a few steps that I took to get this table cleaned up.
Step One: Assess the furniture in the store.
You need to decide if you like the lines of the furniture, if it’s the right size and style, especially if you are not looking to use power tools.If you are willing to use some hefty tools, then you can cut the furniture down and change out pieces to make a style change, but that’s not really the goal here, right? So if you like the look, the size, and the style, make sure there aren’t any major structural failures.
Step Two: Fix any minor structural issues.
When I say structural issues, I mostly mean wobbling. Once you get the furniture home, make sure that you can safely use the furniture. This table I purchased was pretty solid, but typically, wobbling can be fixed by tightening screws and perhaps using some wood glue at loose dowels.
Step Three: Deal with any surface contaminants.
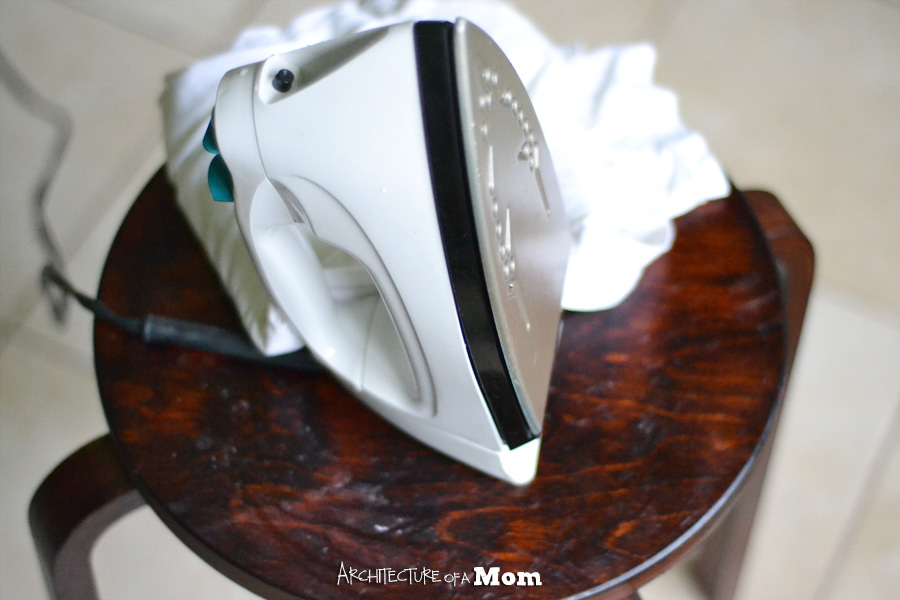
My table was covered in wax. In order to remove wax from a table, you need an iron and an old t-shirt.
Make sure that your iron has no water in it, and then heat up the iron to the cotton setting (medium high). Place the t-shirt down on the table, and then run the iron over the t-shirt, pressing down slightly but keeping the iron moving. Check periodically to see if you need to move to a clean section of shirt until all the wax is removed.
You can use this technique on crayon marks, too. Have other marks? Try a magic eraser. If it’s water marks, there are products that you can find at your local hardware stores that is marketed to remove them; if it doesn’t work, you may need to sand.
Step Four: Remove odors.
When I get a thrift store piece of furniture made from wood that smells “off”, the first step I take is to wipe down all surfaces with a rag dampened with vinegar.
This step is all it took for this table, but if you have drawers or more detail work, you may want to try the following: use furniture wax (like pledge) to clean the surface, sprinkle all surfaces with baking soda, or put cat litter in the drawers for a few days.
Step Five: Camouflage Chips.
If you are not refinishing your table completely, you need to figure out how to hide and nicks, dings or chips. I have a set of blending sticks made for furniture.
I have also heard of rubbing walnut meat on chips, using crayons, or a thin dab of paint. Just be sure to match your medium to the existing wood. The chips on this piece were very minimal, and since I’m still deciding if I am going to leave it “as-is” or if I’ll paint it, I decided to skip this step entirely.
Step Six: Create a new finished surface. (Optional)
I’m leaving my table alone for now, but if you want a new color, then if you are not going to sand the furniture, your options are limited. You can try various paints that do not need sanding and priming, such as chalk paint.
Thanks, Shannah, for having me visit Just Us Four! If you enjoyed this post I
would love it if you came by and visited me at Architecture of a Mom or at these social media locations:
Have a great day!
******************************************************
Thanks so much Rachel! I can’t wait to try out some of these on my next thrift store finds!


Thanks for the suggestion. I tried a lot to clean THRIFT STORE FURNITURE but I can’t do that. Your suggestion helped me to get rid of this problem
I also love buying from thrift stores and it’s always a struggle for me on how to clean them. Good thing that I have found your post and this will definitely help me on doing so. Thank you!
Nice DIY guide! This piece of furniture worth $2.50 is a win for me.
Cleaning furniture is an easy thing for me.
I love these furniture cleaning tips. Will definitely be uses them in the future.
Thanks for the great ideas