
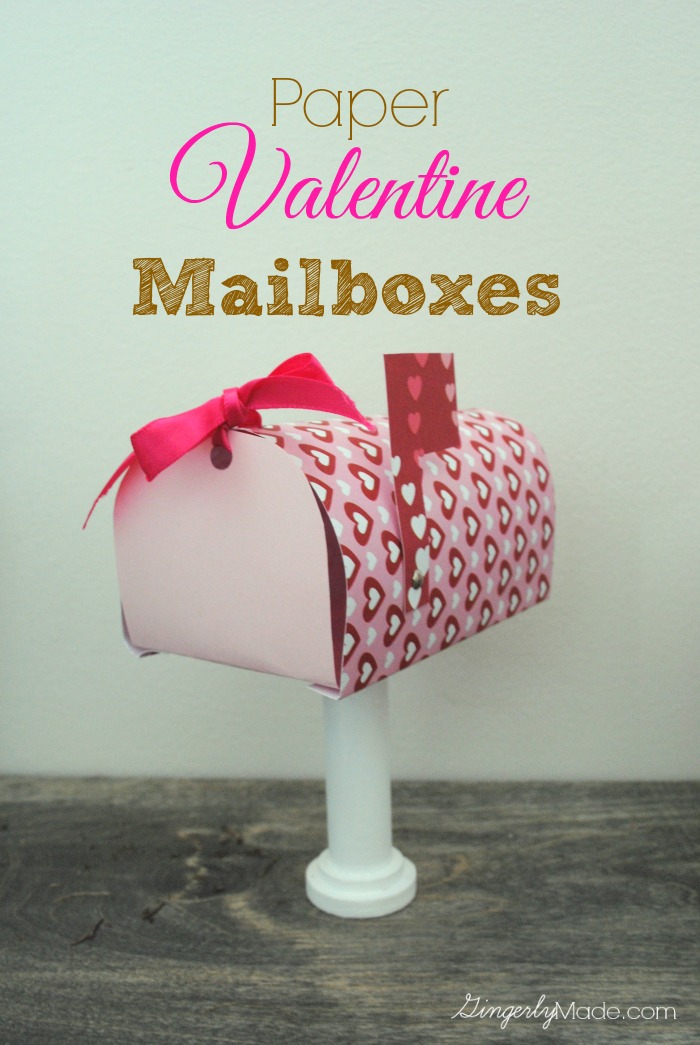
Paper Valentine Mailboxes
This post may contain affiliate links. Please read my privacy policy.

Hi! It’s Ginger from Gingerly Made back to share with you a fun Valentine-themed way to dote on your loved ones and decorate your house at the same time. I am so excited about these paper Valentine mailboxes and the little goodies I get to put in them to surprise my family the week of Valentine’s. After all, it’s not always about the big gestures but the little every day things that makes our love tanks (or love mailboxes) full.
You can make some too! You might need to do a craft store run, but nothing expensive is needed and a lot of things you probably already have around the house.
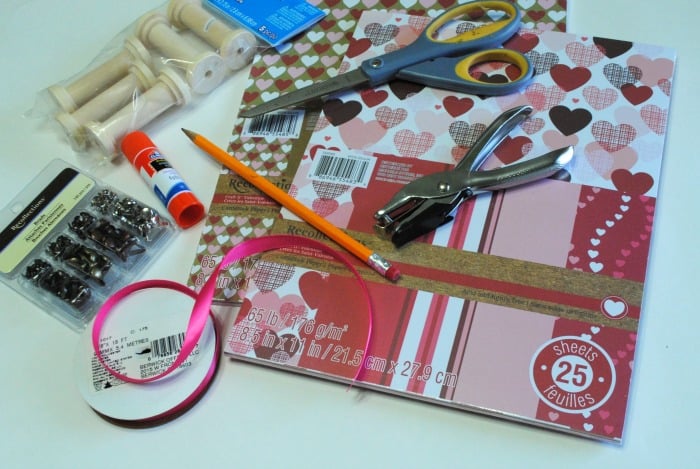
Supplies:
Large wooden spools
Valentine themed paper
Pencil
Glue
Scissors
Hole punch
Coordinating Ribbon
White paint
Brads
Mailboxes:
Start my painting the wooden spools white and set them somewhere to dry. They will be the stand your mailbox sits on later.
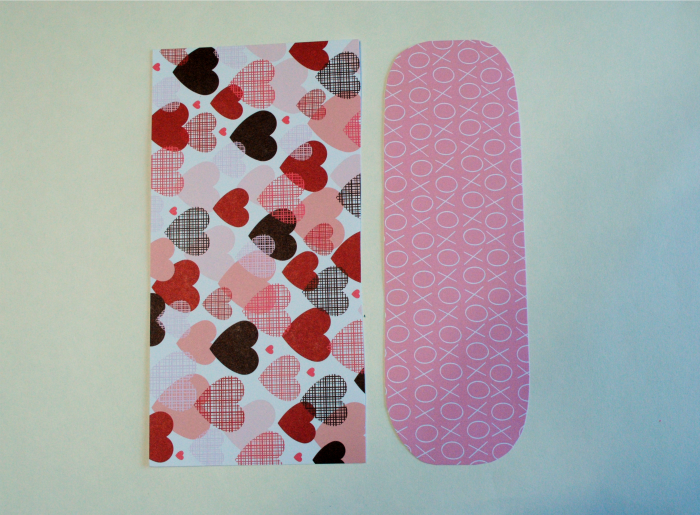
While the spools are drying, use your pencil to draft the shapes you see in the picture below and cut with coordinating paper. I just free handed the oblong shape. It is about 8.5 inches long and 2.5 inches wide. The rectangle is also 8.5 inches long and about 5 inches wide.
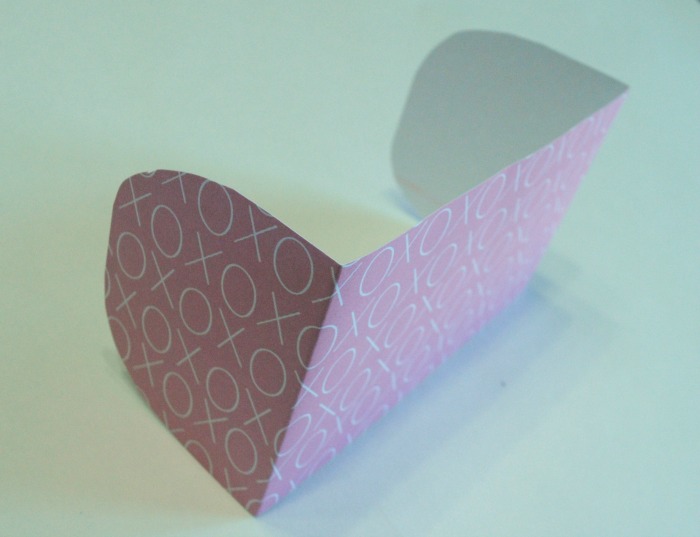
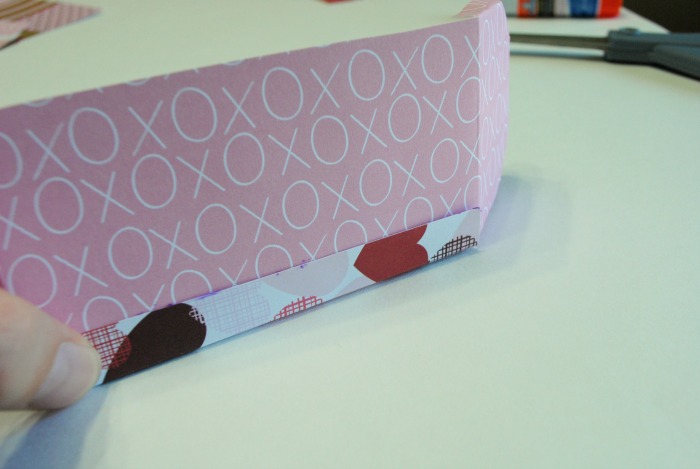
Take the oblong piece. This is the base, door, and back, of your mailbox. Fold ends up at about 1.5 inches in on each side.
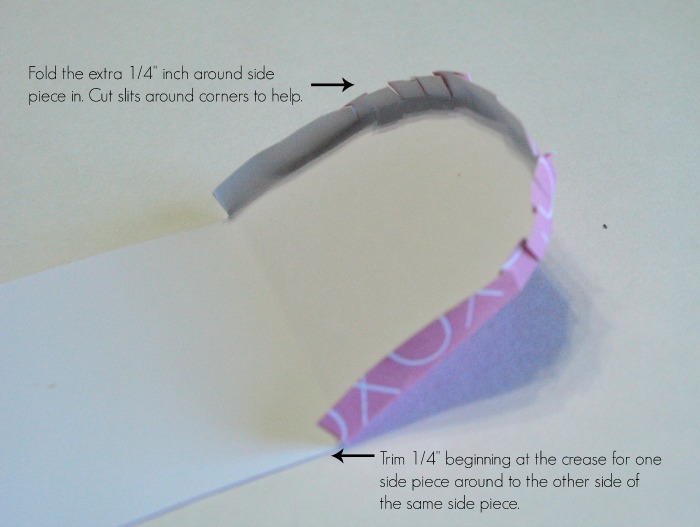
Next, to make sure you can glue the top piece to the back of the mailbox, you need an edge to work with. So at one of the creases, cut in about 1/4 of an inch and trim around the paper so that you have just one end of the paper that is larger than the rest.
Then fold that excess paper towards the inside. Cut slits around the edges to make it easier to fold in without wrinkling the paper. (Sorry for the white on white photo, but I think you can see where the cuts are made.)
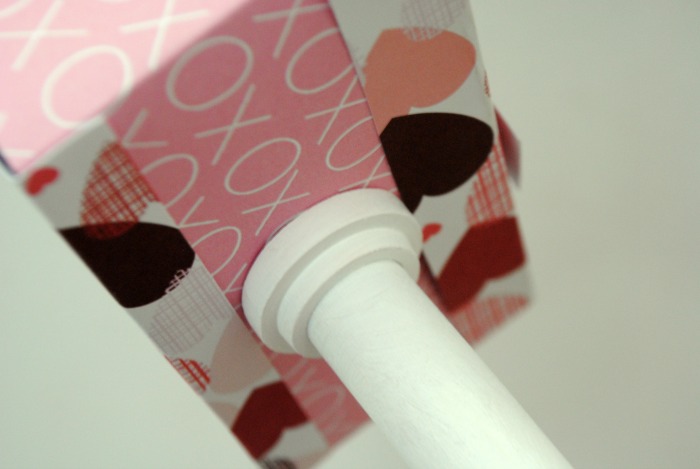
Now you can bring in the other rectangular piece of paper. This will be the top of your mailbox. Begin by folding one side and gluing it to the bottom of your mailboxes base.
Bring top paper around, glue to back of mailbox (that part where you just cut all the slits into the rounded edges) and fold under and glue to opposite side of the base. Trim as needed.
Glue the spool on the bottom center of your mailbox.
Your mailbox needs a flag so you know if you have mail. So cut out a little flag shape and fasten it to the side of your mailbox with a miniature brad.
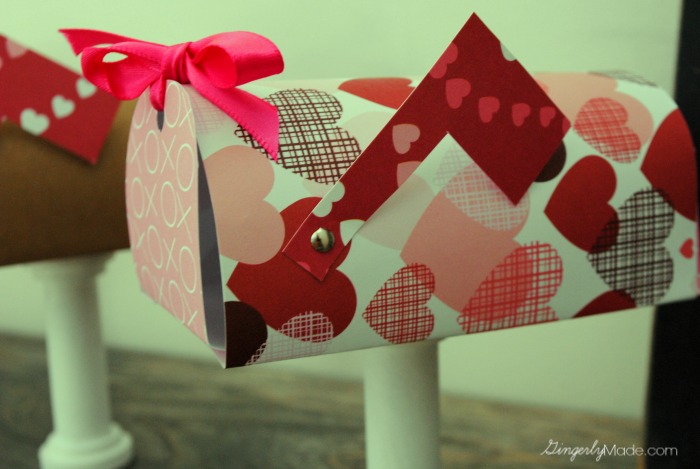
Now all that is left is to punch a hole in the door and top of your mailbox. Close it up with a pretty ribbon.
I made one for each member of our family. My big plan is to put a small gift in each mailbox every day Valentine’s week. It might a Hershey’s Kiss like in the picture below, or a special note just for that person. The point is just to let the little things matter more than big expensive ones.
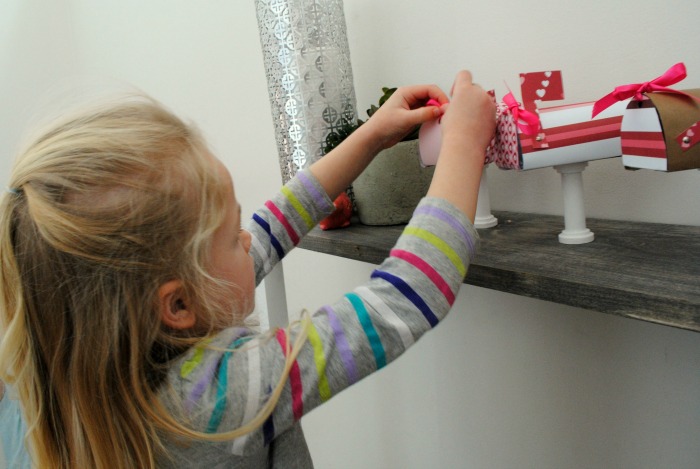
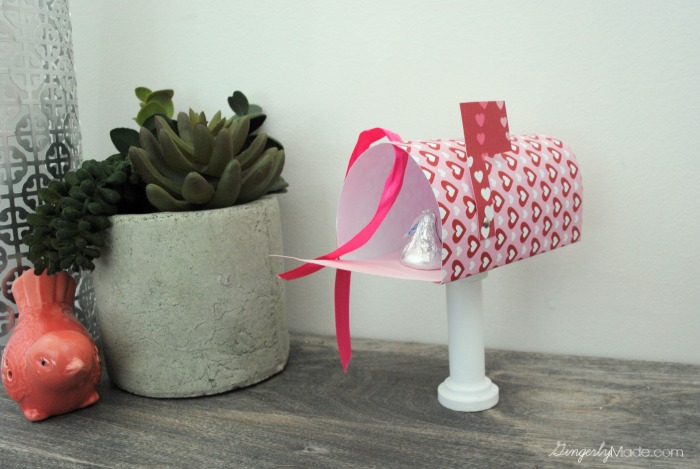
And I think the mailboxes look pretty cute sitting on my Shelf Table too. It’s a great place to add holiday decor!
Thanks for letting me share with you today! I hope you all have a LOVELY Valentines.


One Comment