
May Day Craft: Paper Butterfly Box
This post may contain affiliate links. Please read my privacy policy.
Hello! Jennifer from Satsuma Designs here and very excited to be back at Just Us Four blog – thank you Shannah! At Satsuma Designs, I create Seattle-made baby products and content that help make caring for kids as easy as child’s play. At my blog, you’ll find crafts, organizing tips, recipes, holiday and everyday treats to delight you and your kiddos. Come by for a visit!
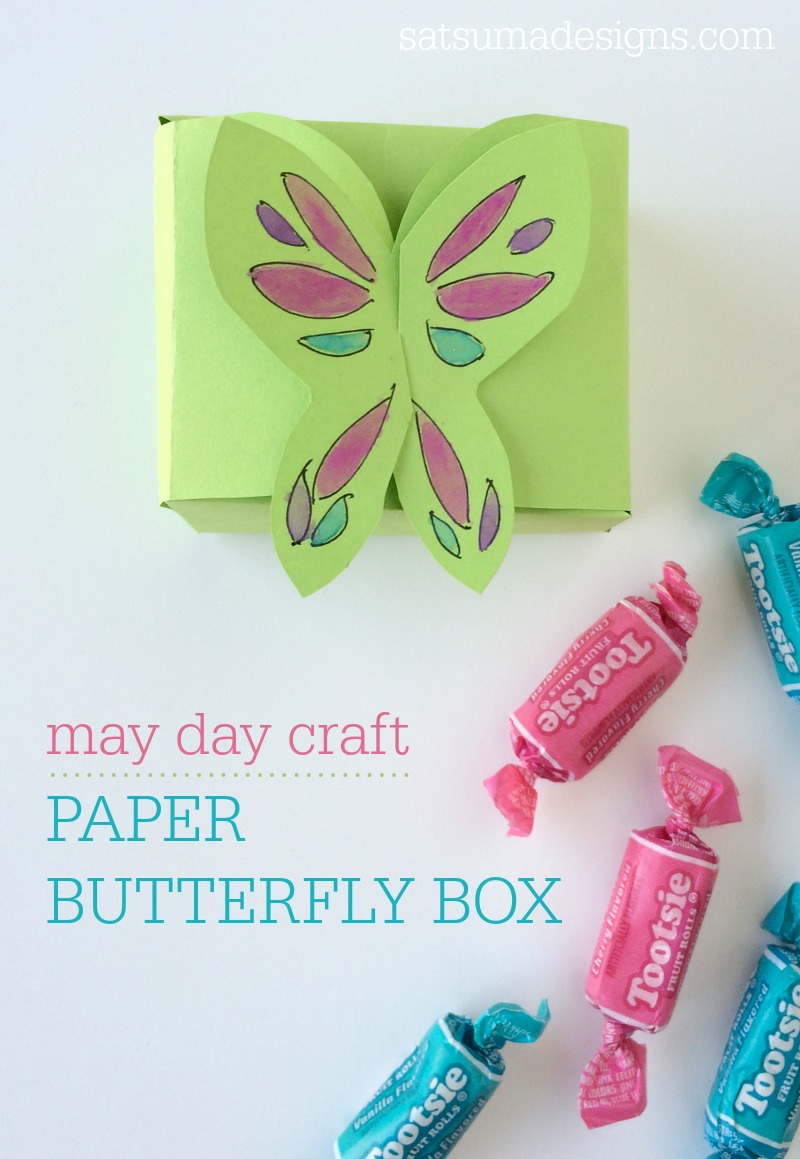
Do you and your kids love to surprise neighbors and friends with May Day flowers on May 1st? We do and if it’s not raining in Seattle this year, I want to drop a little butterfly on each doorstep to welcome spring in with a bang. Here’s an easy May Day craft to try with the kids. My Paper Butterfly Box requires only a few materials that you’ll have on hand and what’s more is that you can fill each little box with leftover Easter candy!
Here’s what you’ll need for your May Day Craft: Paper Butterfly Box
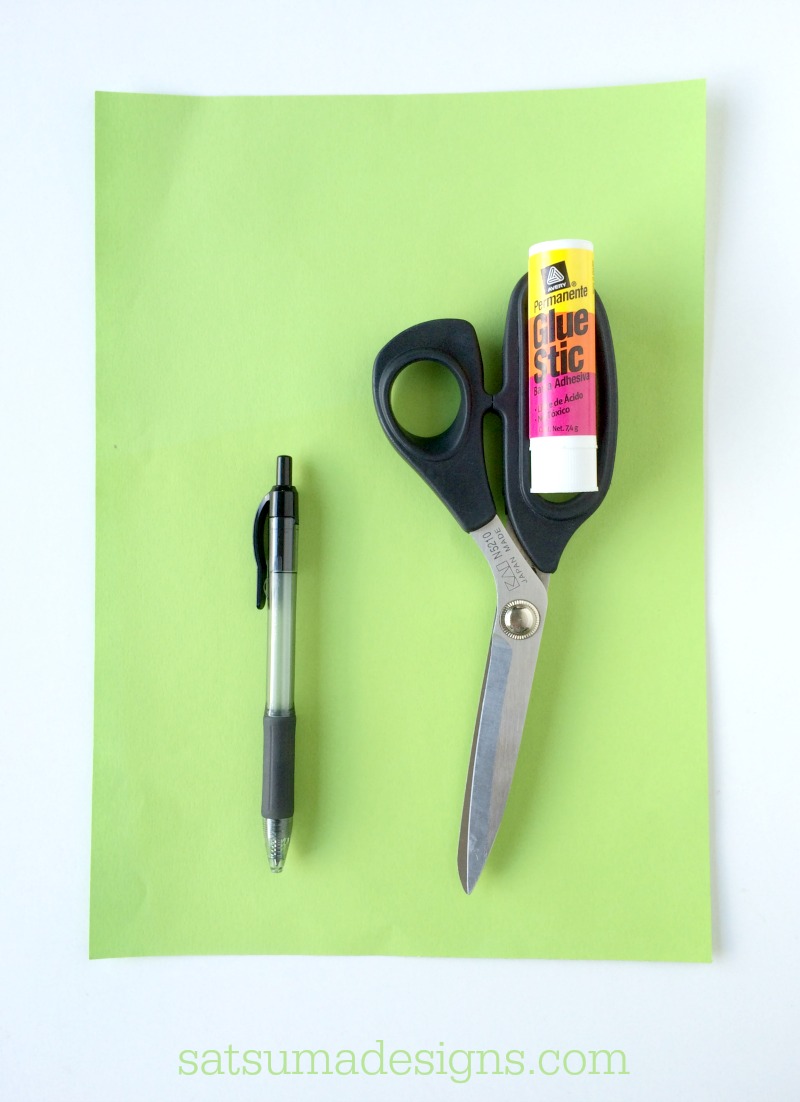
- 8.5″x11″ mid-weight paper stock. I had some green matte construction paper on hand. It’s lighter weight than card stock, but heavier than copy paper. You could easily use copy paper or standard construction paper would work great with these paper butterfly boxes too.
- Scissors
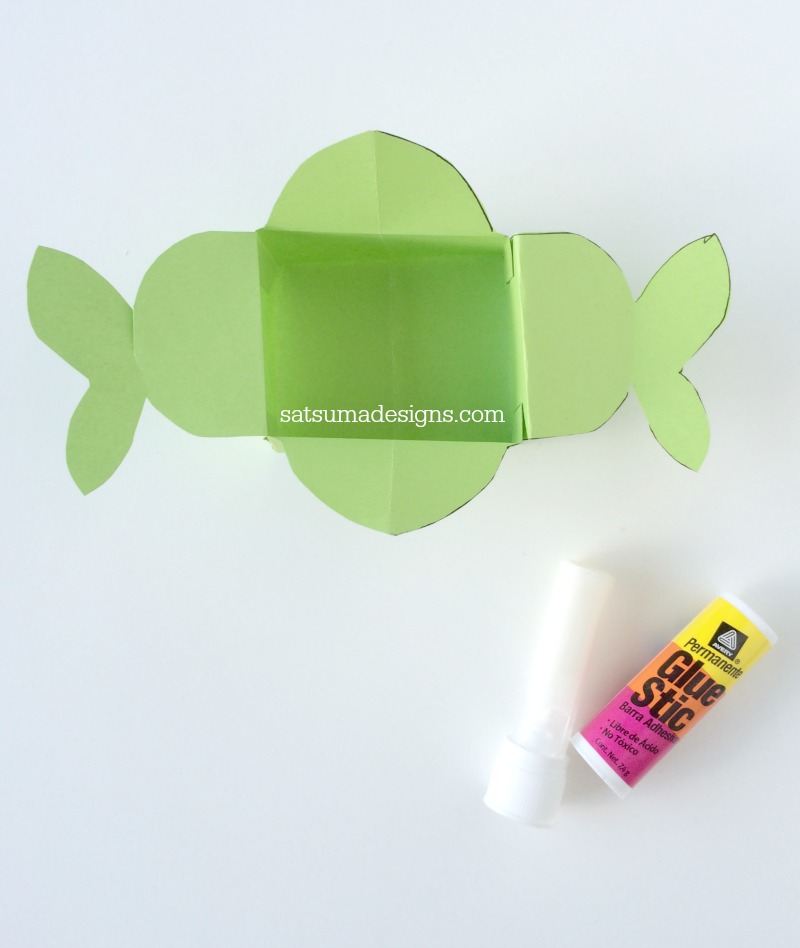
- Glue or glue stick
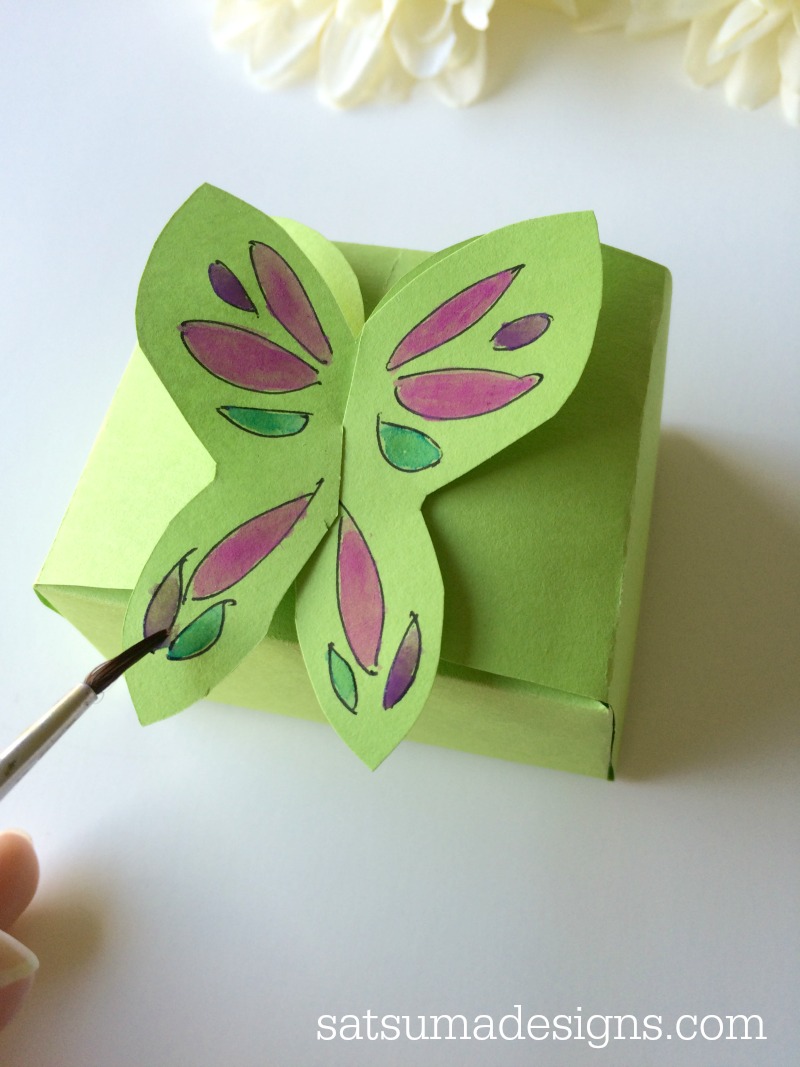
- Watercolors, markers or crayons
- Candies to fill
- Sunscreen for springtime sun!
Make your May Day Craft: Paper Butterfly Box
Step 1. Start by downloading my paper butterfly box template here.
Step 2. Fold your paper in half so the page is 5.5″ wide by 8.5″ high.
Step 3. Fold and trace the template onto your paper.
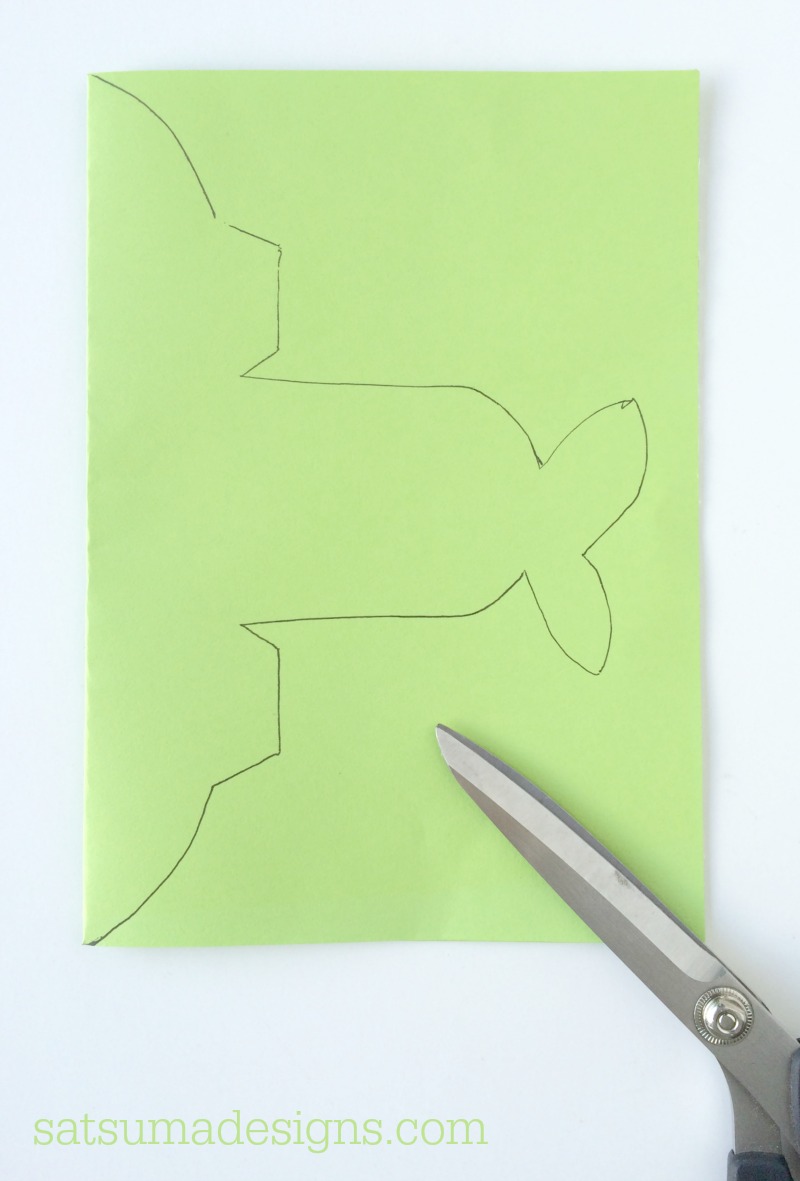
Step 4. Cut out your box.
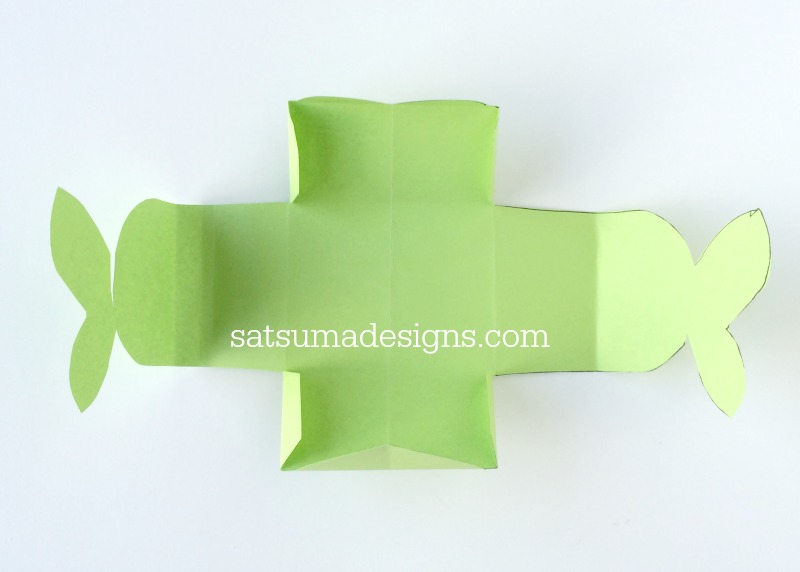
Step 5. Fold tabs and tops to create creases AND cut a little slit at the top AND bottom of each side of the butterfly where it attaches to the box. See the finished product photo below to note slits. Please also note that to get a perfectly shaped box, you’ll want to fold the butterfly sides up to match the height of your top and bottom sides. It will make more sense when you do it.
Step 6. Decorate your paper butterfly box.
Step 7. Glue tabs and secure to the box.
Step 8. Let glue dry, fill with candies and deliver to delighted friends!


What a great idea. Love the butterfly and the tootsie rolls.
Linda, thanks so much! I was so lucky to find these vanilla tootsie rolls in fun colors. Enjoy your spring!! jennifer
Cute!
What a cute idea this is! It’s perfect for mothers day (a good older kid craft)- thanks for sharing.
I stopped by from Totally Talented Tuesdays.
Thanks so much, Jessy! Yes, great for older kids and easy to help young ones with their cutting skills. Try different shapes for the top too: I want to try more animals, but butterfly was no brainer for symmetry. 🙂 Oh, heart is next! – jennifer
LOVE this paper craft! what an awesome idea for celebrating Spring, May and butterflies! I am not sure what I am going to do with it but I want to make several. I shared with Kristina too so she could share at her church. I think this would be a great craft for the Sunday school crowd! Thanks for sharing with Snickerdoodle Sunday!
Kristina & Millie, thanks so much for the great idea! I think this would be lovely at Sunday School. I can see a Cross on top as well. Would be neat to fill with little paper Bible passages for last day of Sunday School to have kids be able to read over the summer. Fun! – Jennifer
These are so cute! I love this!
Cute craft idea. I love the sunblock as a gift. Thanks for linking up with Small Victories Sunday link up.
Sweet idea. Pinned and tweeted. I hope to see you on Monday at 7, we can’t wait to party with you! Lou Lou Girls
Oh wow! This is gorgeous! I totally want to do this!! We’re studying butterflies in May too!
Thanks for sharing (and for linking up to the #SHINEbloghop).
Wishing you a lovely day.
xoxo
These butterfly boxes are so cute! We featured you at the Project Stash so top by and pickup your featured button…you earned it!