
How to Make an Industrial Desk
This post may contain affiliate links. Please read my privacy policy.

What do you do when the holidays are winding down?
Do you bake homemade mac n’ cheese?
Do you get a jump start on the new year and start exercising or decluttering the house?
Or do you just say…let’s forget all of that and watch Netflix?
In case you are wondering…we make things.
It is a wonderful team sport around here…one that I love very much.
So a couple weekends ago, when we were in the middle of Christmas craziness, we decided to make a desk for our Little Monkey.
He is in second grade. And every 7 year old needs a proper desk to do all that studying coloring.
He is in second grade. And every 7 year old needs a proper desk to do all that studying coloring.
my hubby designed a desk and made it! All I had to do was paint it.
Well, that and tell him the desk was a little too tall.
“Can you please make a few Miner adjustments to the height, please?”
We like to do things twice around here…keeps it interesting.

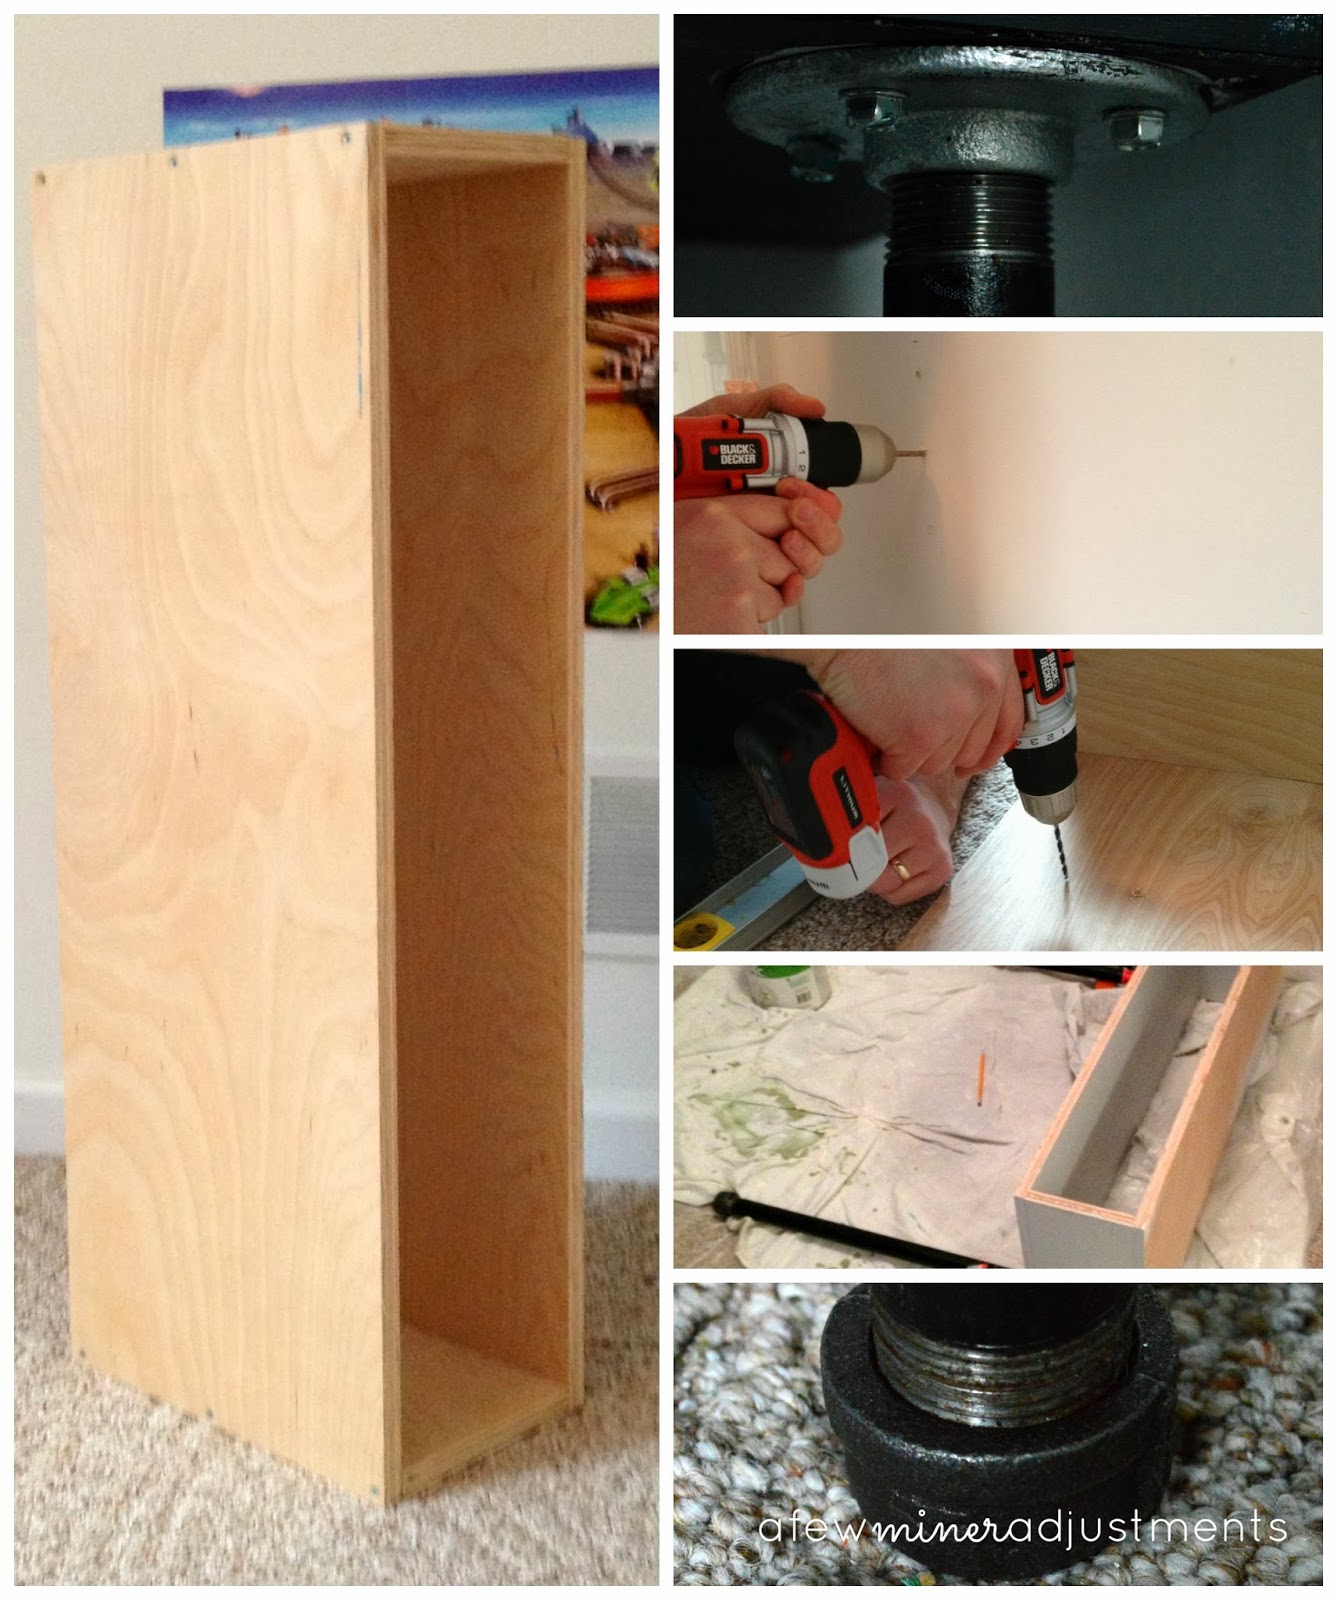
Industrial Boys Desk How To: Supplies:
4 pieces of wood (measure the wall you want it on to fit it properly)
Our dimensions are: 2 pieces -36 1/2″ x 13 1/2″ and 2 pieces – 6 1/2″ x 13 1/2″
Wood Screws
2 Metal Brackets
Lag Bolts
2 Metal Pipes
2 Pipe End caps
2 Pipe Holder Thingies {this is a technical term…please see picture to clear up all confusion}
Our dimensions are: 2 pieces -36 1/2″ x 13 1/2″ and 2 pieces – 6 1/2″ x 13 1/2″
Wood Screws
2 Metal Brackets
Lag Bolts
2 Metal Pipes
2 Pipe End caps
2 Pipe Holder Thingies {this is a technical term…please see picture to clear up all confusion}
Wood Glue
Wood Putty that can be painted
Stud finder
Random Thought:
Did you know that Lowes will cut and thread a pipe…for free?
Little Monkey and I went to watch. It was so interesting.
Instructions:
1. Dry fit the four sides together to make sure they all line up.
2. Pre-drill the holes for the screws to attach the sides.
3. Put glue on the edges (of the short pieces) that will be attached to the top and bottom of the desk.
4. Screw in the screws… hopefully you now have a nice sturdy box.
5. If the desk is perfect with no changes needed {remember that time when I said we like to do things twice…we actually took it all apart and made the side pieces shorter} fill in the screw holes with the wood putty.
6. Once the putty is dry, sand it smooth.
7. Prime and paint the inside and outside.
8. Put the pipe pieces together and attach the legs to the front two corners.
9. Measure the wall up to where we want to put the brackets.
10. Use the stud finder and find a sturdy stud {not my hubby} to hook the brackets into.
11. Place desk against the wall on the brackets and check it for level.
12. Attach the screws to the desk and the brackets on the inside of the desk, so they can’t be seen from the top.
Hope your kids enjoy their desk as much as our Monkey does! Happy New Year!


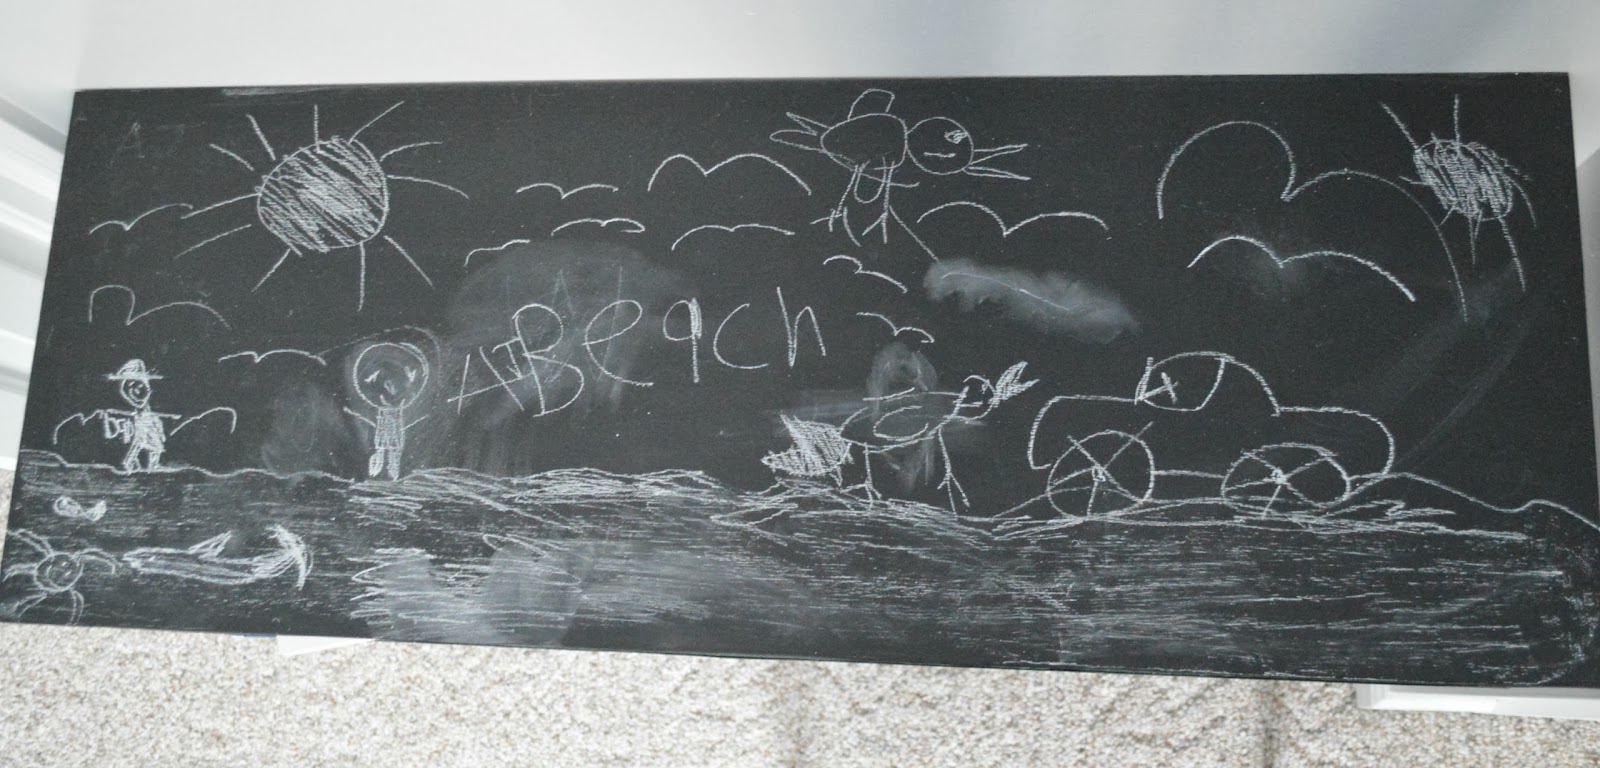
What a great desk! And I love how it’s chalkboard because that makes it so much more fun than just a boring homework desk. Pinning and sharing on Facebook!
Thanks so much. Trina did a fabulous job on the desk for sure. I love the chalkboard part…I would doodle all day.
Thank you, Rebecca! I can’t take too much credit for it. My hubby did most of the work.
Great desk – my son would have loved to have one like it when he was young!
Thanks! Didn’t Trina do a fantastic job with it? I love it too.
Thanks, Shannah!
Thank you, Maria! My boys really love this desk.
What a great project Trina!! I absolutely love this and that you were able to make it out of scraps you already had at home. (and I looove a good paint project!) 🙂 Thanks so much for linking this up to the Bewitchin’ Projects Block Party last week. You are one of my featured picks at tomorrow’s party over at Recreated Designs. Hugs, Lisa
What a great project! This would look so good in my kids room and they would love it. Thank you so much for sharing with us at Throwback Thursday, we hope to see you again this week!
What an awesome desk! I love that you painted it to double as a chalkboard. So cool! Just wanted to let you know that I’m featuring it at this week’s link party! http://www.thelifeofjenniferdawn.com/2016/01/diy-projects-for-home-and-little-bird.html
Thanks for this guide! Glad I stopped by to check it out!
Awesome guide! Definitely a unique project and one that isn’t too much work while looking great.