
Kid’s Art Gallery Wall {The Cheap & Easy Way}
This post may contain affiliate links. Please read my privacy policy.

When my oldest son was in Kindergarten I didn’t see one piece of art work all year. Then in June on the last week of school he brought home a folder bigger than him full of all the art he had created that year. I was overjoyed looking through it.
I wasn’t sure what to do with it, so we hung it in his closet for the next year. Then he finished 1st grade and brought home an even bigger folder of art. So we took down the art in his closet and hung the new art.
Here is where it gets tricky though…the following year my youngest son went to Kindergarten. So by now with them in fourth and second grade, you can only imagine how much art has come into this house.
To top it off the art isn’t the size that will fit in a file folder or a scrapbook.
It was time to make a few miner adjustments.
I experimented with different ideas….photographing it to make a digital scrapbook and toss the actual art. But when it came time to put it in the recycling bin, I just couldn’t bring myself to do it. I mean, who am I to say all that time spent creating was recycling bin worthy and not gallery art worthy.
And that is what I decided to do….create a kid’s art gallery wall with it. {And everyone who knows me knows how much I love a good gallery wall. Like here and here}.
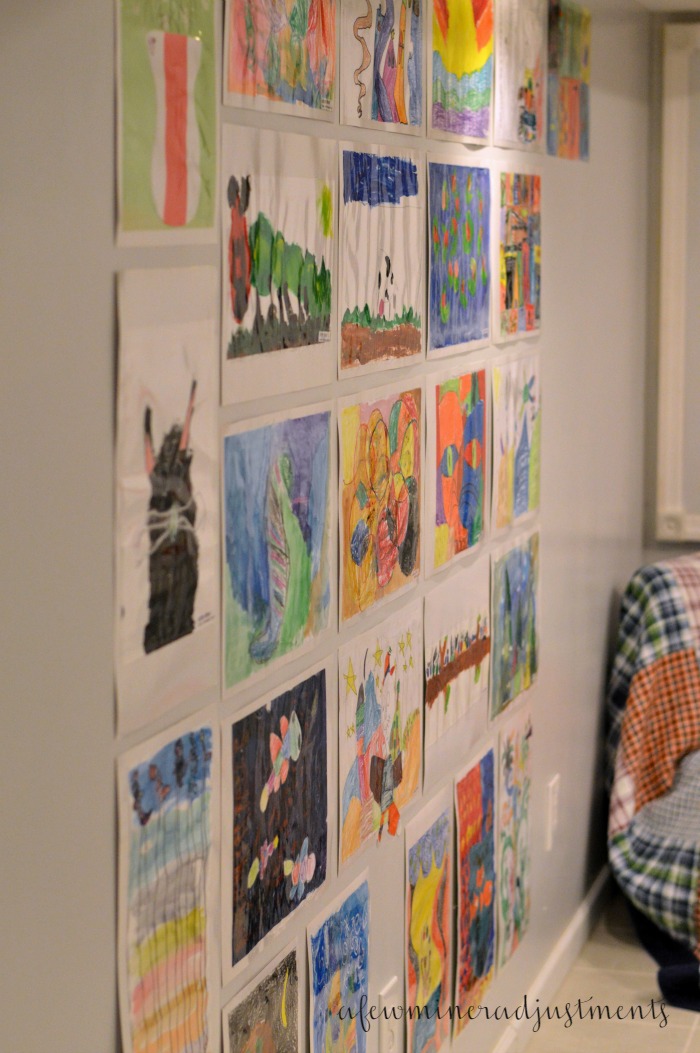
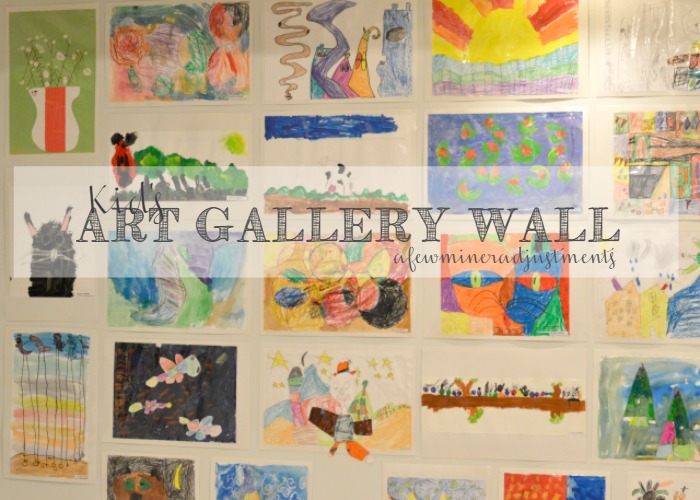
Framing all of it would have been way too expensive. So I took all of the construction paper backing off because they were all different faded colors of paper.
I glued each art piece onto white construction paper to create a frame.
Then I laminated each piece. {I have access to a laminator, but if you don’t you can get this done at Staple’s for a fraction of the cost of frames}. I laminated the art to give it a little shine and to protect the colors in each creation.
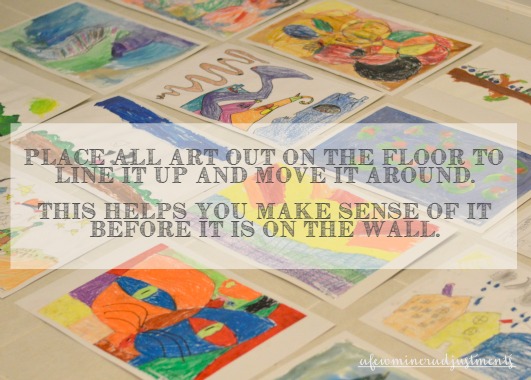
Next, I lined up all the pieces on the floor and played around with placement. I wanted to make sure that there weren’t too many of the similar colors or animals next to each other.
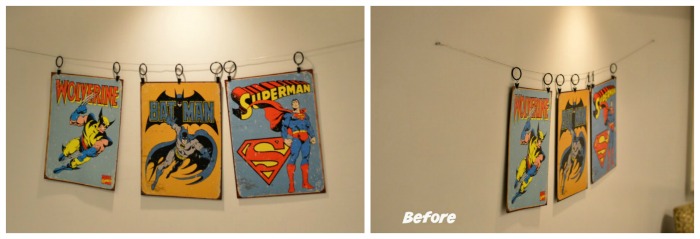
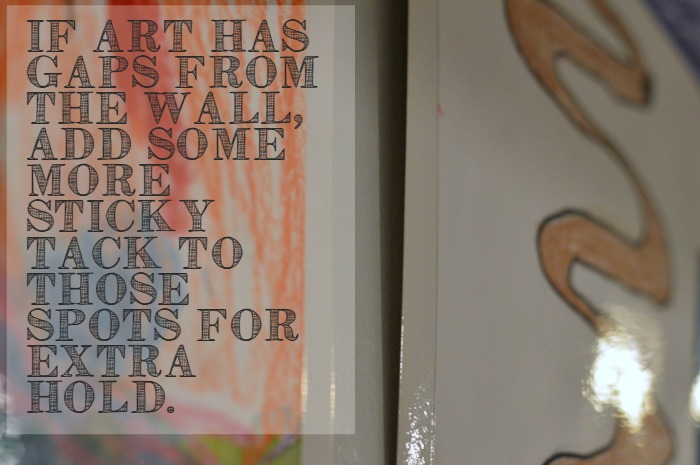
To hang them, I used sticky tack. This can be bought at any art supply store, maybe even at Target in the school supply/ art supply aisle.
Then I eyeballed the spacing. Each piece is about a half inch from the next and the corners match up.
The vertical pieces are all around the edges of the gallery.
When my sons saw the wall….which is in their play room…their eyes lit up.
By honoring their art…I am honoring them. I cannot wait to see what they bring home at the end of this school year!


really great! I would however recommend taking good photos of the works of art before laminating them so that you can use the art as printables or just have to enjoy in the future. thanks so much for sharing on craft schooling Sunday!
Love the idea of laminating the pictures!
Very cool.. I also love the idea of laminating the pictures so they last!