
DIY Photo Backdrop Stand
This post may contain affiliate links. Please read my privacy policy.
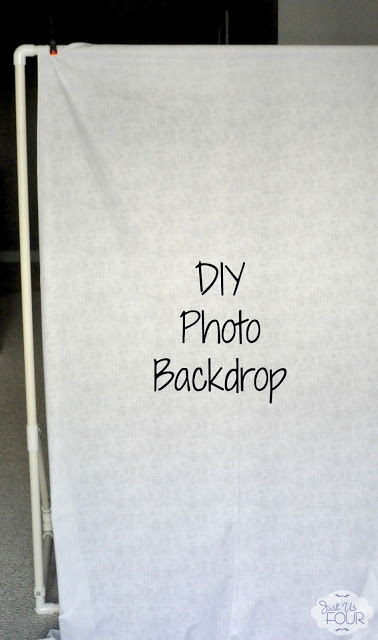
A photo backdrop stand makes taking great pictures at parties, events or even for a blog, easy! Learn how to build a DIY photo backdrop stand of your own for around $16 using plumbing PVC pipes and this simple to follow, step-by-step tutorial!
These days a photo booth is all the rage for parties and life event. Create your own easy to make DIY photo backdrop stand using this simple to follow, step-by-step directions!
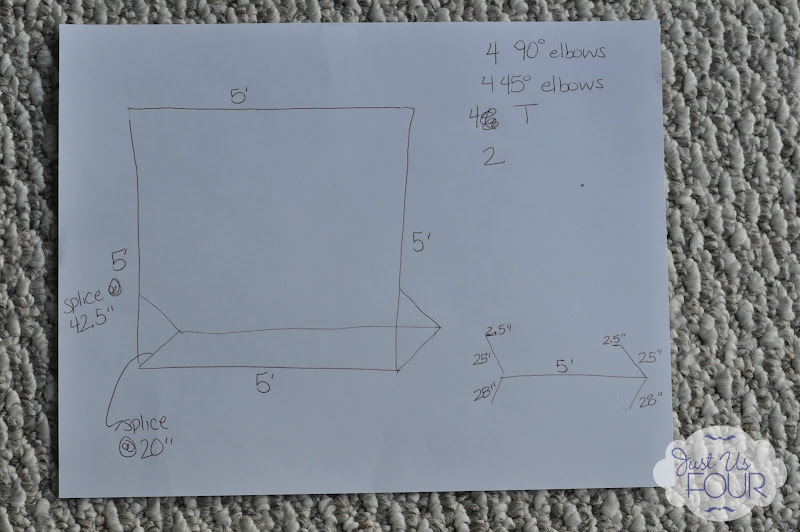
Awhile back, Mandy made a photo backdrop stand and it totally inspired me to make my own. I am such a visual person that I needed a picture before we got started…this is where my remedial drawing skills get shown off.
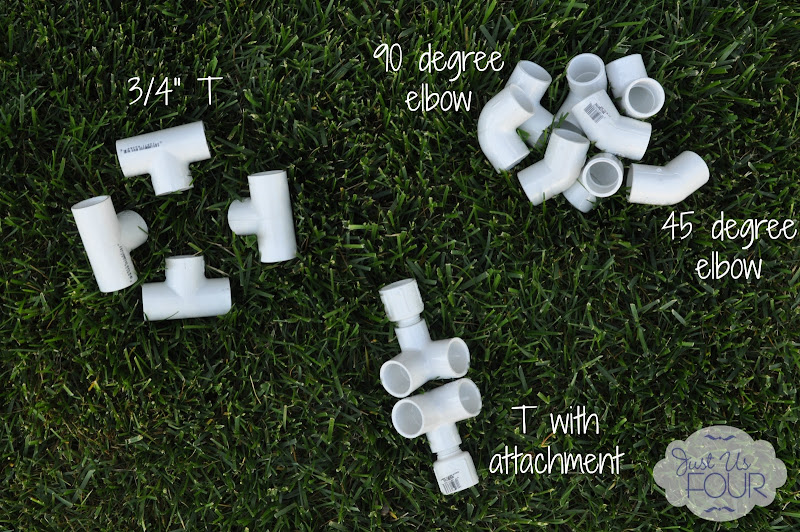
I dragged Mathlete into Home Depot’s plumbing department and we picked up our supplies:
4 3/4″x 10′ pipe
4 3/4″ 90 degree elbows
4 3/4″ 45 degree elbows
4 3/4″ Ts
2 3/4″ 90 degree T-ish things {technical term} with screw in attachments
Clamps
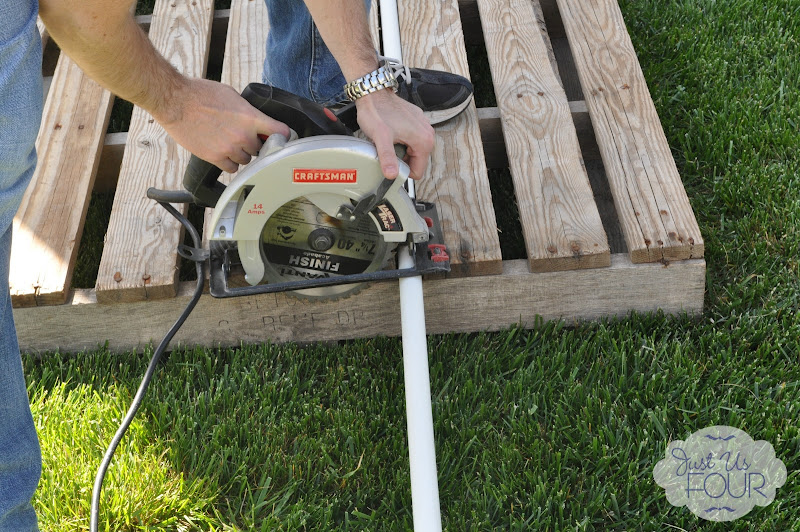
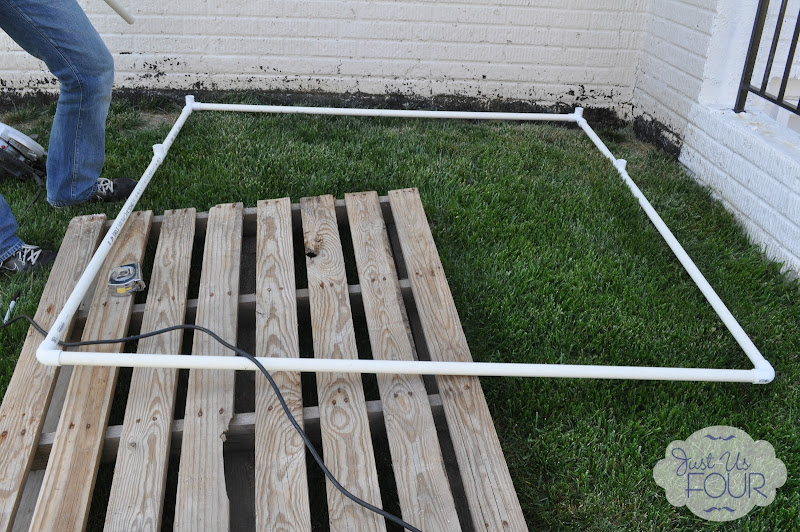
I wanted the backdrop to be 5 feet by 5 feet so we started by cutting 4 5′ long pieces to make the front frame. A handy tip: If you have a pallet around, the pipe fits perfectly between the openings for cutting!
Then, using the 90 degree elbows on the top and the 90 degree T things with attachments on the bottom, we attached them together into a square.

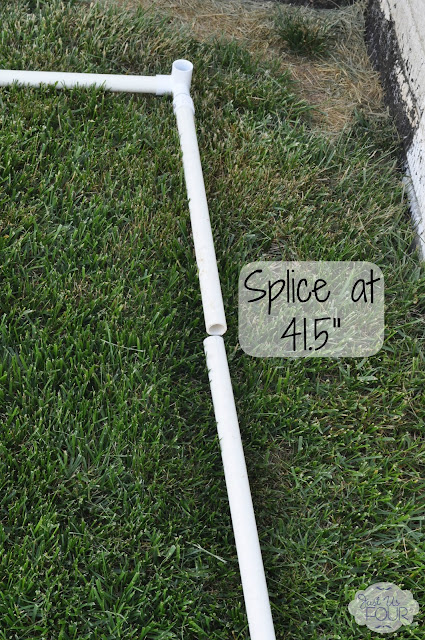
On the sides of the square, cut the 5′ foot piece at 41.5″ and connect a T to each one.
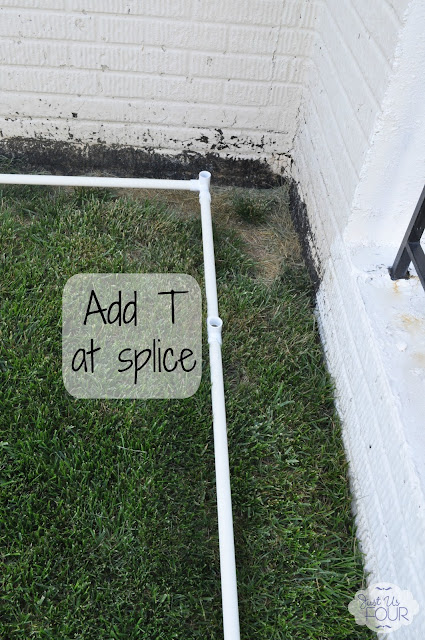
Now your square looks like this
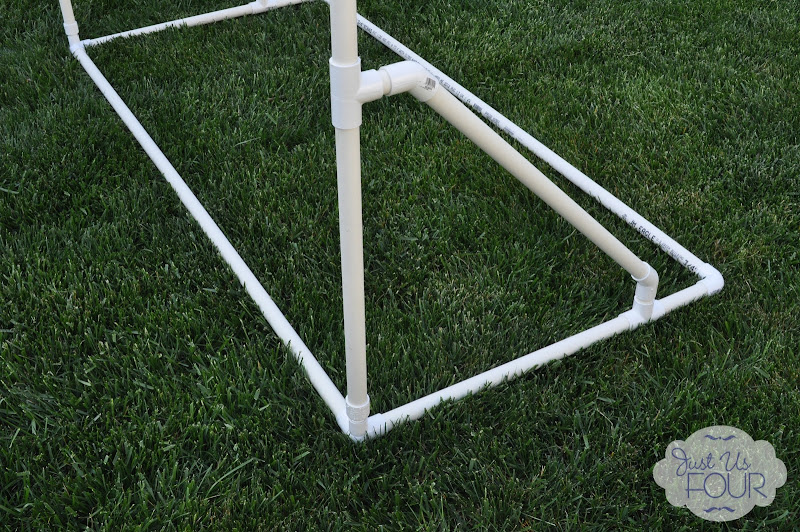
To make it stand up, we needed to add in the back support which included the rear bar and diagonal pieces to connect them all.
First, we cut another 5′ piece for the rear bottom.
Then, we cut two pieces to 28″ for the bottom side pieces. Cut each of those into two pieces of 20″ and 8″. Connect them with the T.
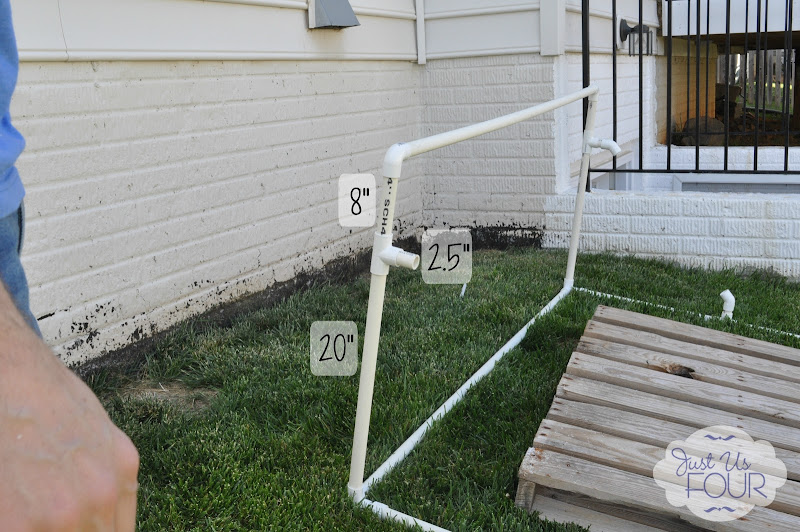
Add a 2.5″ piece of pipe to the top of the T and put a 45 degree elbow on the other end.

For the diagonal, cut two more 2.5″ pieces and two 25″ pieces.
On each of the long sides of the square, Add 2.5″ piece and then connect a 45 degree elbow. Place the 25″ piece into the two 45 degree elbows.

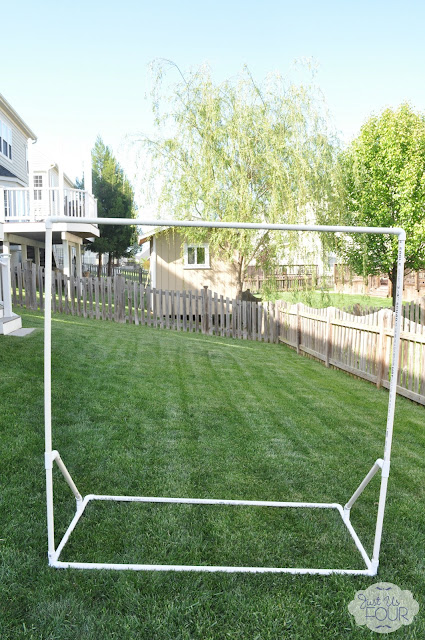
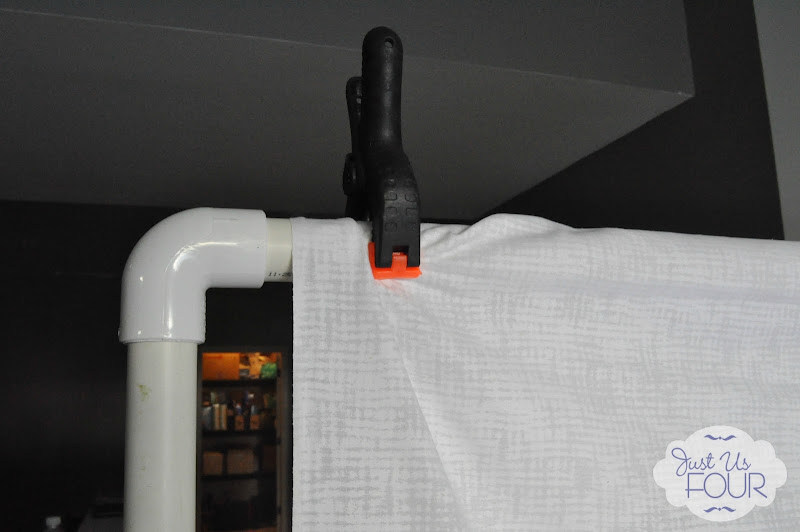
Stand that baby up and clamp so fabric or whatever you want as your backdrop to it.
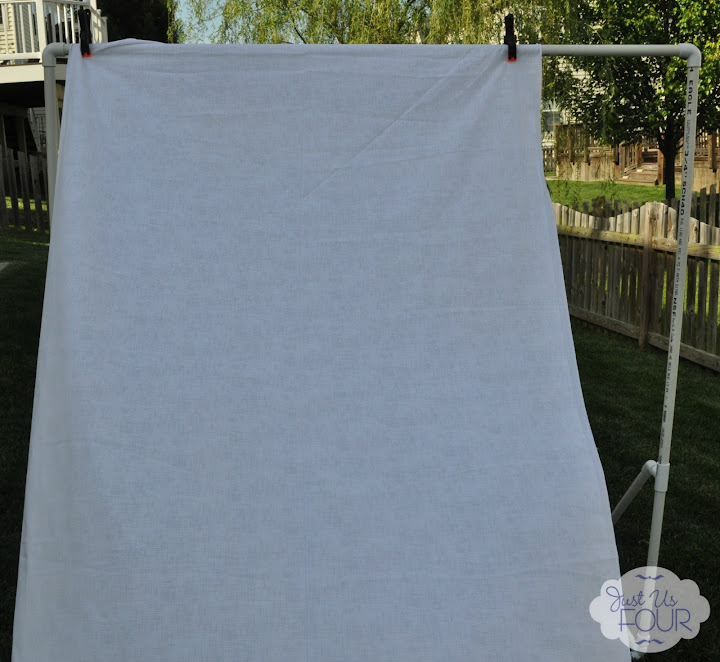
I would need to check my receipts for exact figures BUT for an estimated $16.00 {including the clamps} I was able to make this backdrop stand. I love that considering most of the pre-made ones go for much more than that!
Have you ever made a photo backdrop stand? What do you typically use for backgrounds in your photos? If you try this project, please let me know in the comments or connect with me on social media!
If you liked this Photo Booth Backdrop, check out some of my other easy DIY:
- DIY Chicken Wire Message Board
- Teacher Gift: DIY Soy Candle
- DIY Quilted iPhone Case
- DIY Vinyl Necklace {Guest Post}


Great tutorial!!!
Thanks! I really wanted to help people easily recreate it if they wanted to.
What a great idea! I need some major help in the photography department, might have to try this out!
Happy Blogging!
Happy Valley Chow
Thanks! I love how it turned out! I think we’ll use it for my kid’s birthday party too as a photo booth.
Nice job! I need to do something like this, right now I don’t have anything that I use, my photos need a little bit of work still 🙂
My photos still need work but this makes it easy to make sure the background isn’t the problem. Plus, it makes it easy to change out backgrounds for different projects.
Wow, amazing results! I love the idea and detailed planning. Drawing plans is where I come up short.
I am terrible at drawing plans too. Thankfully, I have my husband to put into reality some of my ideas I have trouble actually making reality. I don’t think I would have ever gotten those measurements all correct without him.
Now I definitely need one of these. What a great idea. Thanks for the tutorial too. Thanks also for joining Inspire Me. Hugs, Marty
I absolutely love this! It is so easy to take apart and put back together too.
Awesome idea for those bigger projects! Pinned!
That’s cool! It really does work as a soccer goal too :). Let us know if it really helps with the photos.
Amanda (found you through the Not JUST a Housewife blog hop).
Thanks for coming by! I am hoping it does help with photos because I won’t have to worry much about my background anymore.
Great tutorial! Thanks!
How timely for this post! I just made a similar stand this week, but it won’t stand up properly. I was going to lean it against the wall (and still might) but now I see how to get it to stand up!
Mine would totally be leaning up against a wall if it wasn’t for my husband! Let me know if you need some help with the measurements. The husband has some math formula {psht math!} that he used to make it work.
I need to make one of these! Thanks for the tutorial!
Thanks! It is so easy to make once you get started. Good luck.
This is a great idea. Quick question, though. What do you use for countertop photos for photographing food or small projects?
I usually use a combination of white foam core boards {Elmer’s Brand} for my backdrop and bottom. Then, I add in whatever napkins, etc I plan on using on top of that. My bottom is just a flat foam core board and the back is a tri-fold.
I could so use one of these 🙂 Fabulous tutorial! Thanks so much for sharing at Mom On Timeout!
Love it! great inexpensive idea and thank you for the tutorial! 🙂 I’ve done things to help out with the photos too but nothing as great as yours! 🙂
Ingrid
Awww thanks! I am really working hard on making my pictures better. Thanks so much for coming by!
Awesome project, Shannah! And it doesn’t look too hard! Thanks for sharing! Jenna @ Rain on a Tin Roof
Thanks! Once we had the measurements down, it was pretty easily to put together. 🙂 Thanks so much for visiting.
whoa! That’s impressive. Thanks for sharing at Two Cup Tuesday on Pint Sized Baker . I’ve pinned it!
I totally need this! Thanks so much for the great tutorial. I guess I need a trip to Home Depot. Thanks for sharing, and have a great day!
This really is such a helpful thing to have! It also makes for fun times when taking pictures of the kids or at parties!
Love this! I saw it on our power pinning at Pinapalooza and had to tell you what a great idea! I’m definitely making one soon!
Love this idea. I am just starting my photography business/hobby.
How much materiel did you get for this then?
I bought the wider home fabric and then got 2 or 3 yards I think.
Wow thank you so creative! Will have to make it for my photo booth rental company! thank you.
https://www.happyboothco.com/
Hi Shannah! I absolutely love this and your plans are so detailed and easy to understand. I’m going to make this but I’d like it a little taller. Thinking my backdrop would be 5′ Wide by 6′ Tall – Would I need to adjust the support stand in the back? Would I need to make the Split a little higher and add extra inches to the (25″) pipe that connects to the 45 elbows?? If your husband (the math wiz!) could help, that would be amazing!
Hi – You would definitely need to adjust the measurements if you are making it taller. I will ask my husband what the other measurements should be.
If I want to make the frame 6ft by 6ft. Can I keep the other measurements the same for the support pieces behind the frame?