
Stenciled Trick or Treat Bag
This post may contain affiliate links. Please read my privacy policy.
My daughter is totally obsessed with the mustache trend. Despite throwing a baby shower that featured mustaches, I don’t really get the whole excitement behind the trend. Yeah, it is funny but mustaches on everything just seems odd. Oh well, clearly my daughter {and most of the rest of the world} thinks it is cool so what do I know? When we were working on her trick or treat bag for this year, she spied one of my Martha Steward adhesive stencils in the shape of a mustache. The rest was history and her stenciled trick or treat bag was born.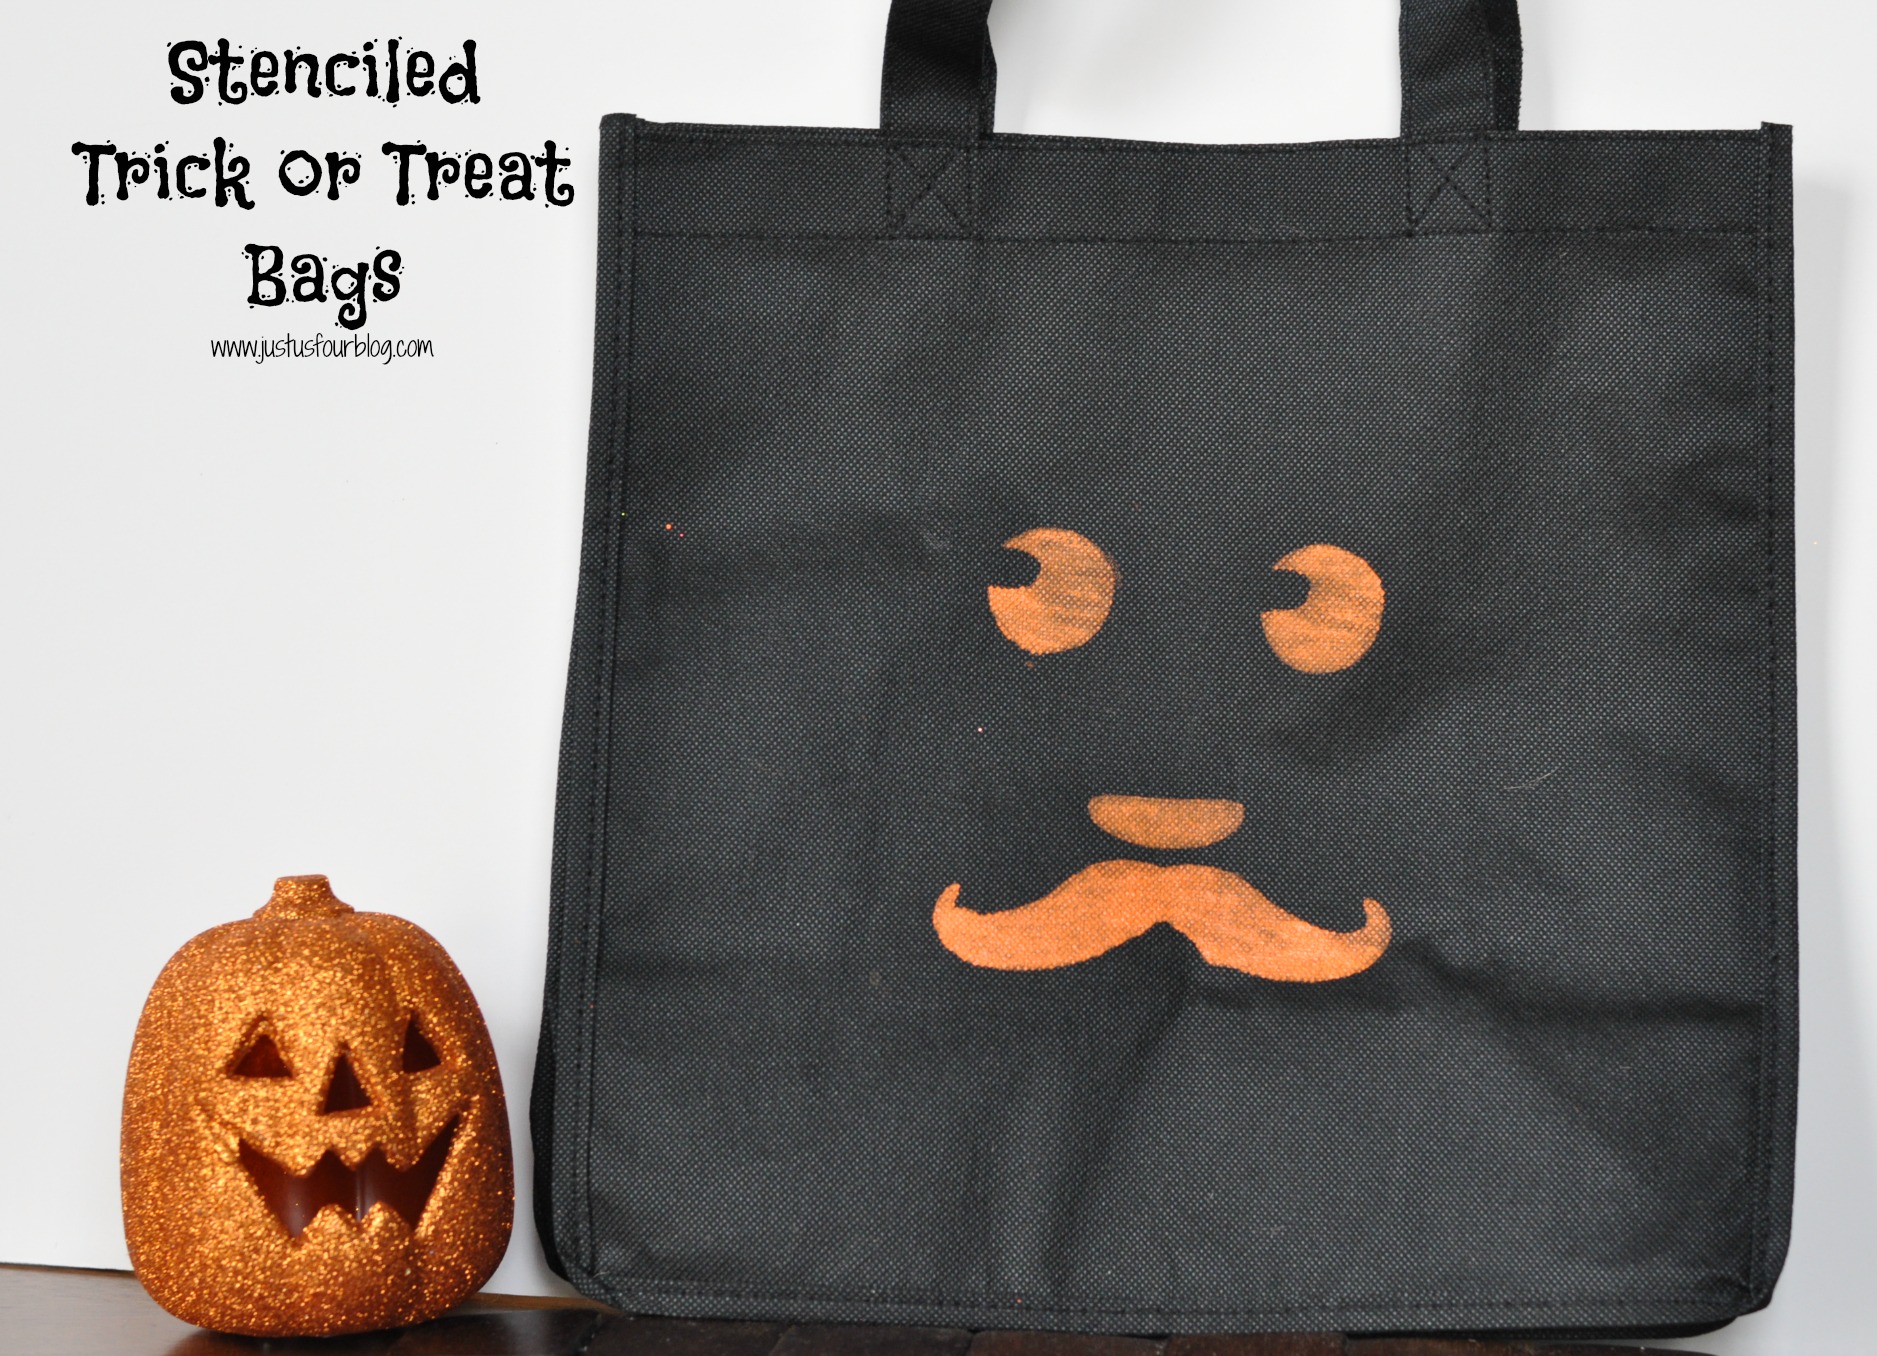
This is another one of those crazy simple crafts that I love doing because my kids can get involved. Since the bag is for H, I really wanted her to make the decisions on what went on it and help out with the final product.
The first step is obviously choosing your stencil. I love the adhesive stencils because they are so easy to work with. They didn’t stick as well to the fabric on the bag as they do other things but I still think they worked better than a traditional stencil would have.
Place your stencil where you want it to go on the front of your bag.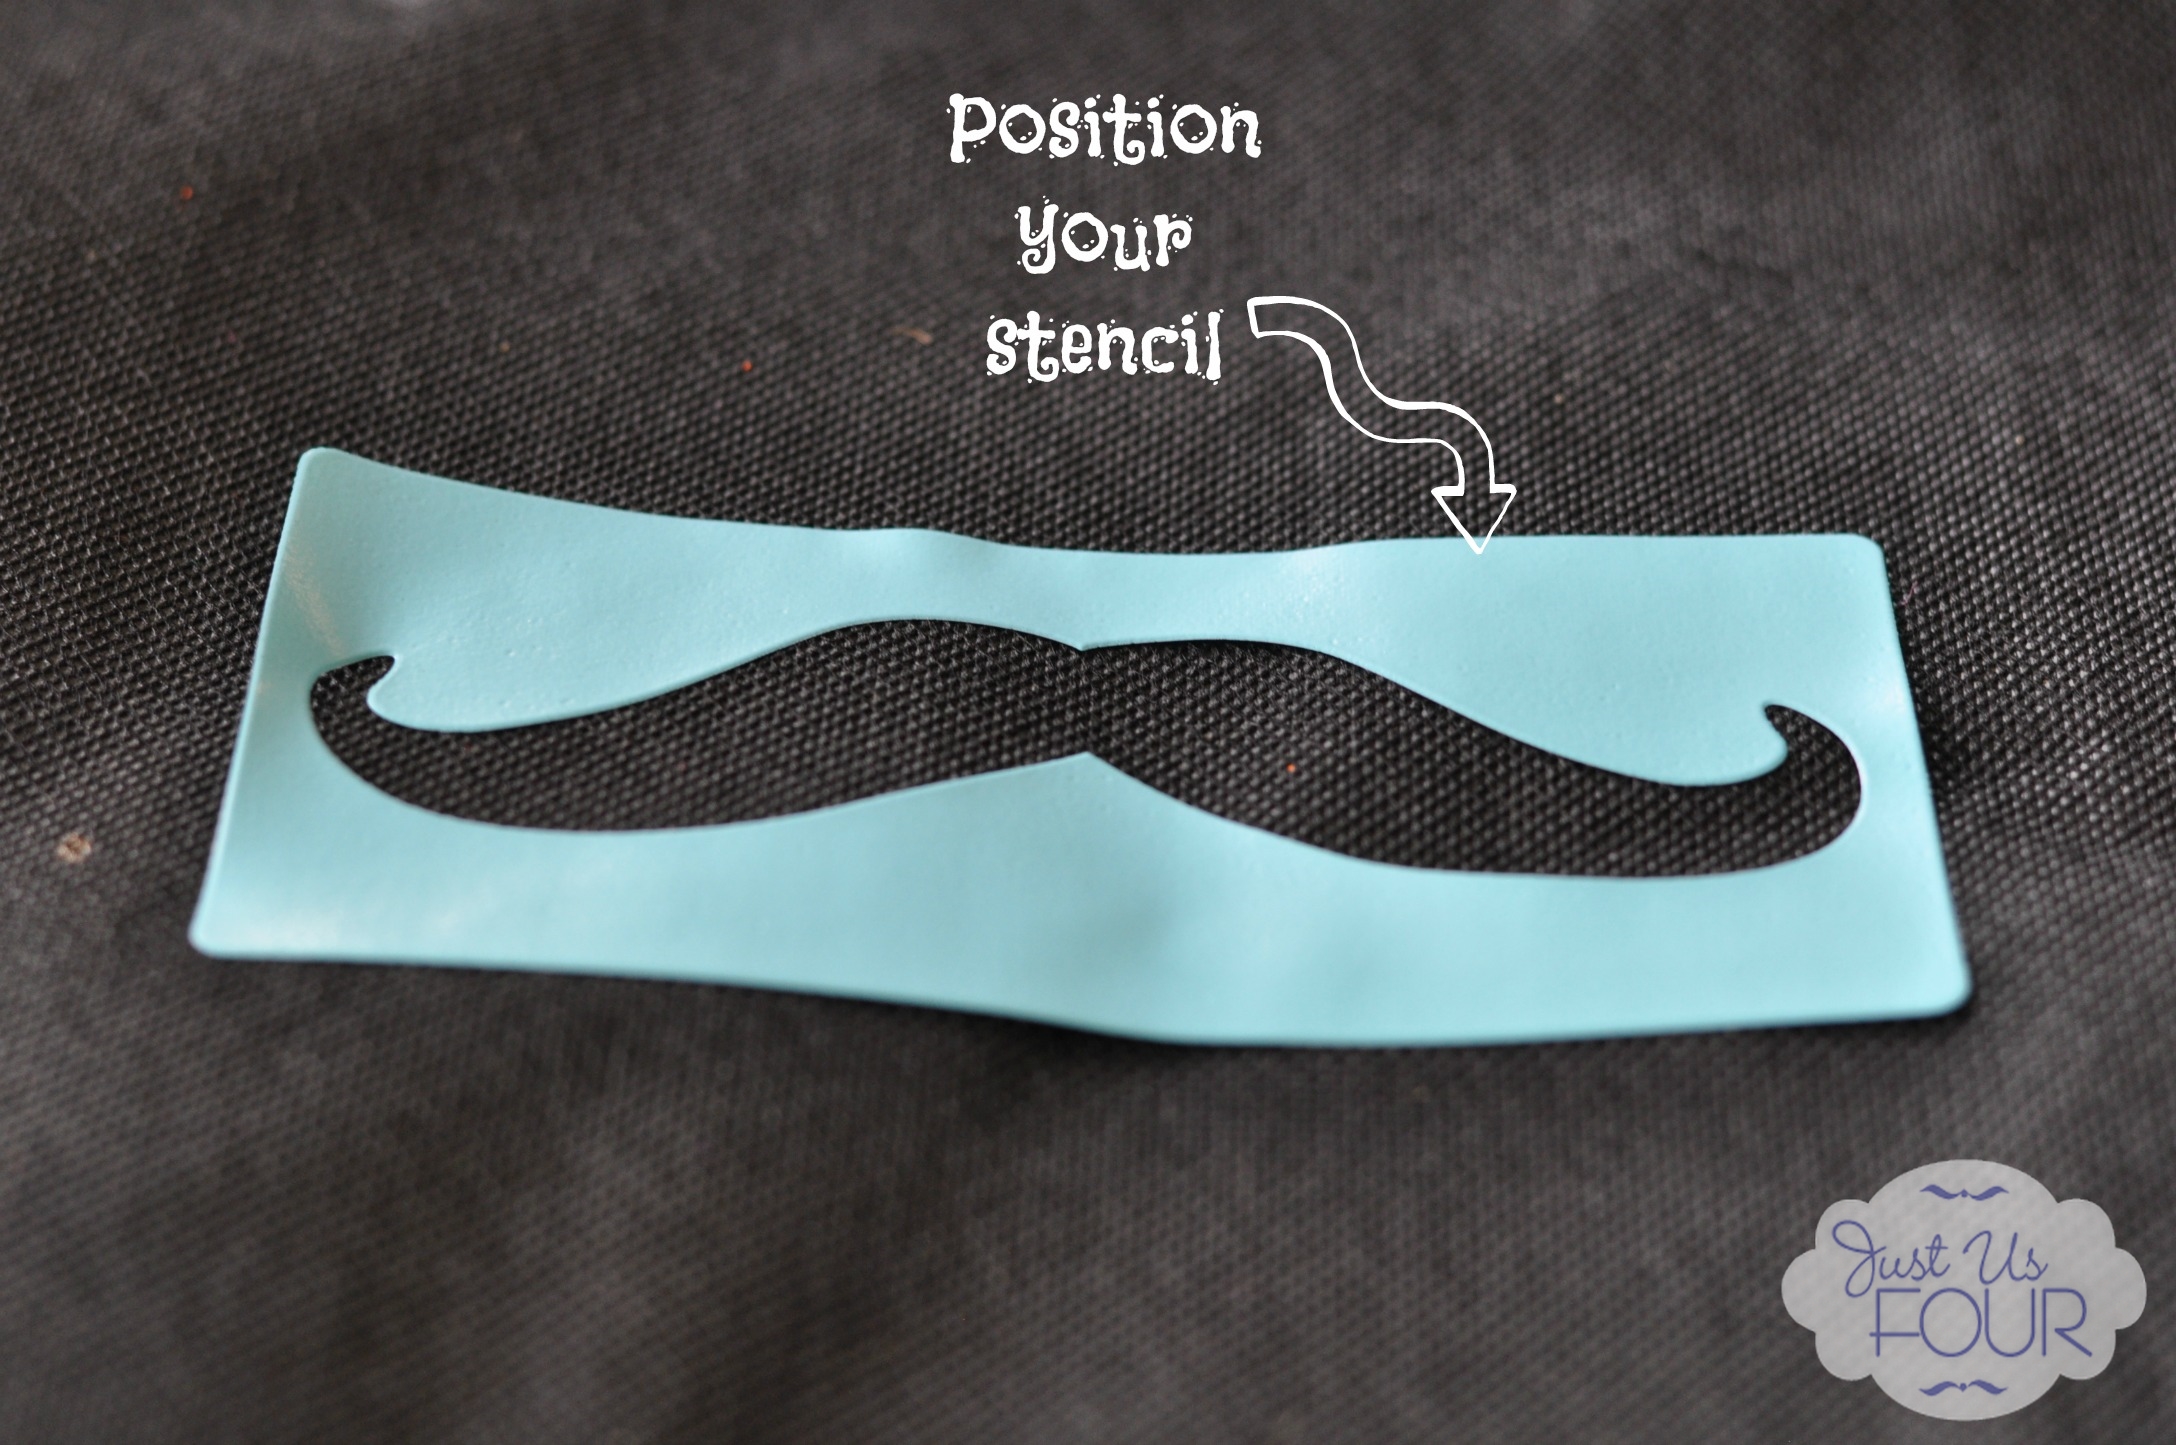 Then, grab your paint and start filling in the stencil area. I used regular acrylic craft paint because I know we won’t be washing these bags. If you plan to wash your item, I would recommend adding fabric medium to your paint or buying fabric paint to use with your stencil.
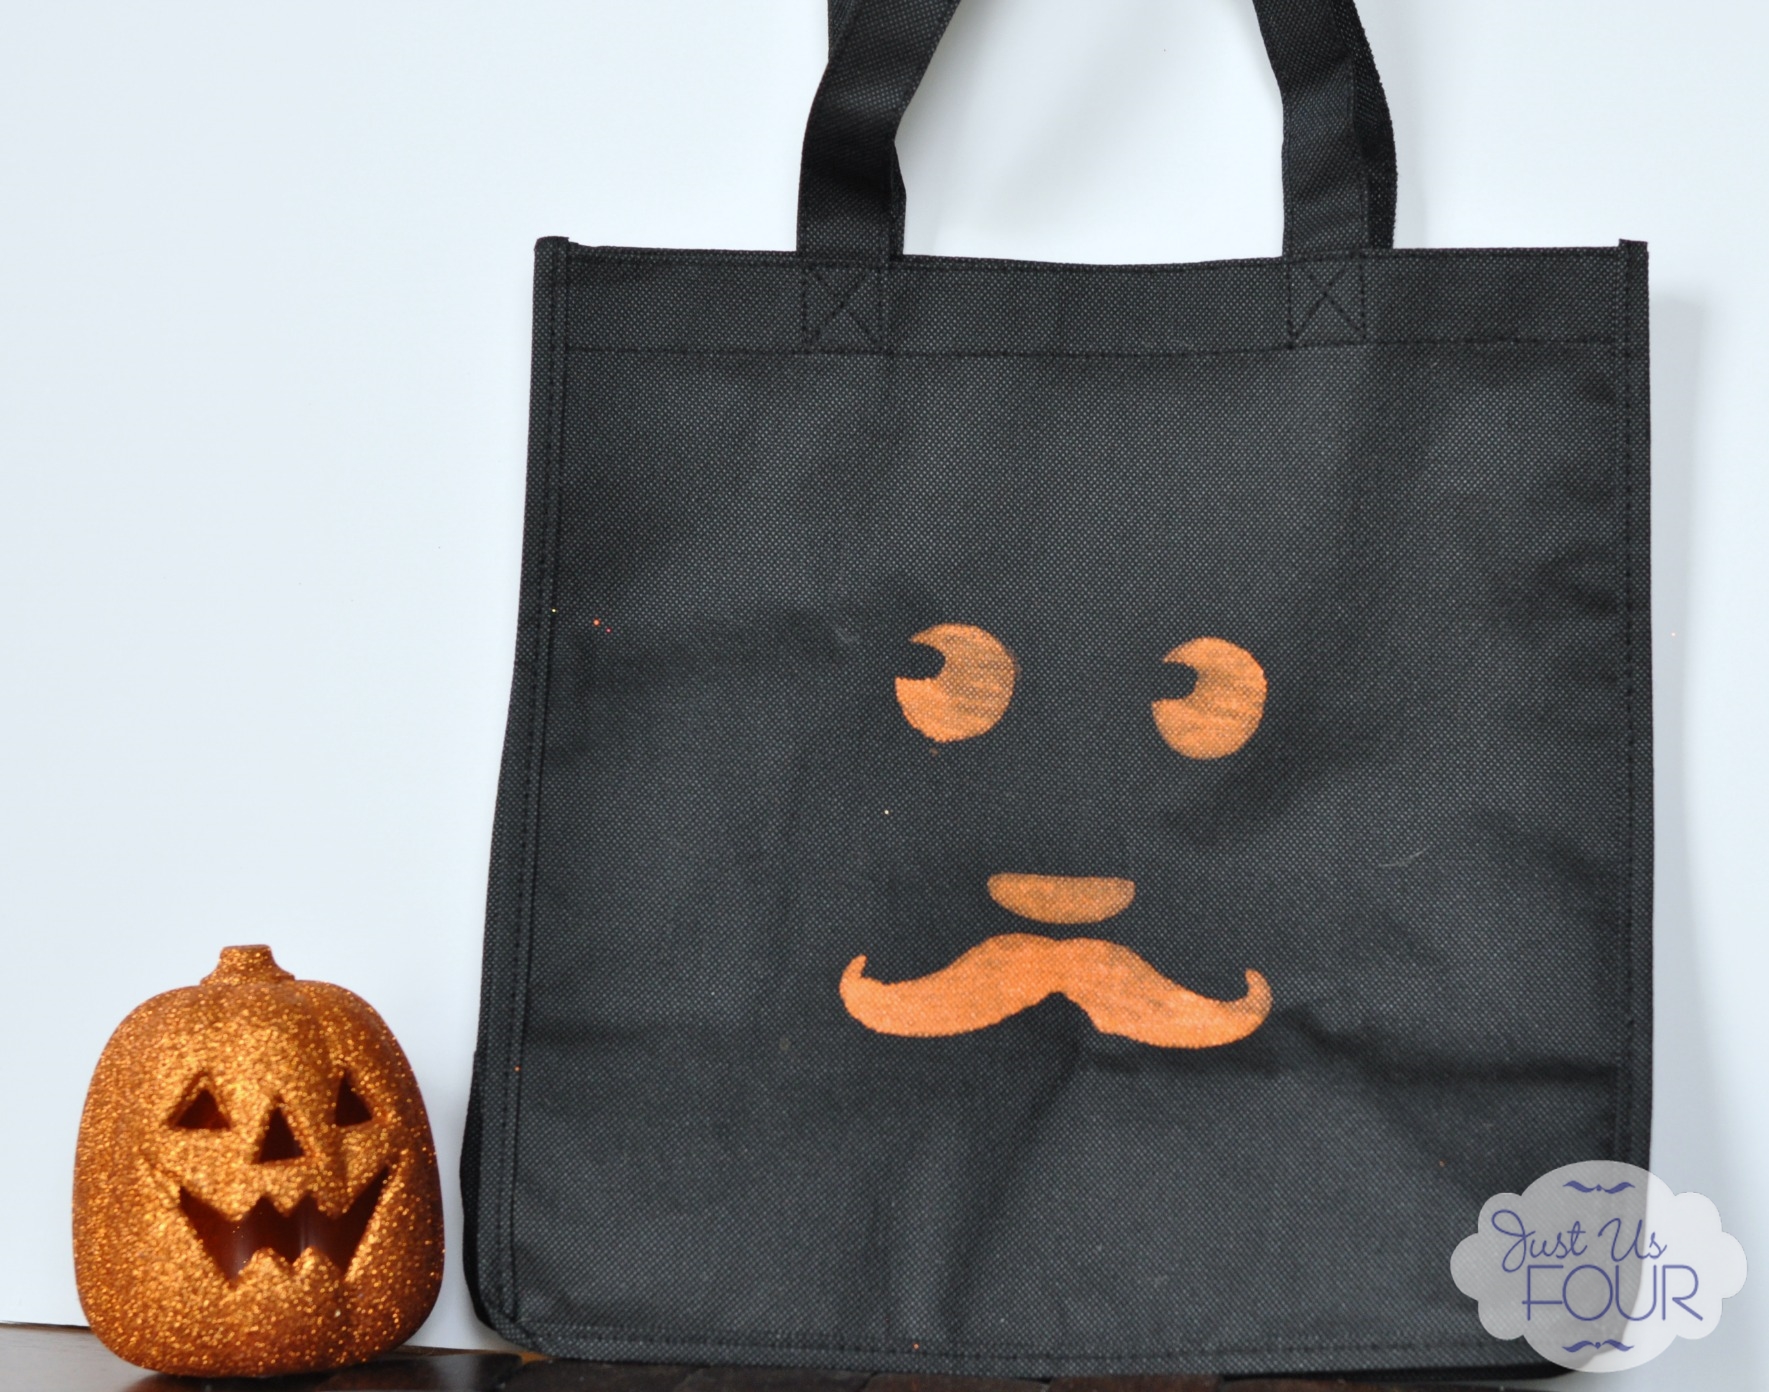
Once you are done stenciling all of your parts, let the paint dry and you are ready to go gather candy.
 Do you make new trick or treat bags each year? Have you ever tried stenciling one with your kids?
We had so much fun on this project that I think it may become a new family tradition.
This post has been shared at the list of fabulous parties found here.


Such a sweet Halloween bag, I love lhow easy it could be to make….I will for sure try this out,, thanks for sharing how you made this…Too cute, phyllis
We do make treat bags every year Shannon! At least my younger daughters still like too. They’d be all over the mustache stencil too.
fun
Cheers!
Shannah, what sweet little bags! I can just imagine how adorable they will look for trick or treating. Thanks for sharing – pinning and sharing today! Have a happy Wednesday!
Thanks! We had fun making them for trick or treating. I can’t wait for the kids to use them.
Cute, cute, cute. Such a creative idea. Love it. Thanks tons for linking to Inspire Me. Hugs, Marty
Thanks! We had a great time creating these.
Sooo cute Shannah! ox