So the next lesson in our series is something I seriously need to get started on so I will be reading along with everyone as Katie shares how to create a newsletter. I remember talking with Katie when she was first setting up her newsletter so I was super excited when she agreed to share with you all all that she learned in the process.
Hi everyone! I’m Katie and I blog over Made to be a Momma where you will find diy crafts, sewing tutorials, recipes, stories on motherhood and a few blogging tips! I am a wife and momma to two little boys. I am so excited to be here at Just Us Four! Shannah is a good friend of mine. We have talked numerous times throughout the past year and I had the great pleasure of actually getting to meet her in person last month at the yearly SNAP! conference!
I was a little hesitant to take over this part of Shannah how to series because I am certainly not a pro at techy behind the scene blog stuff. Give me some fabric and tell me to make something and I’ve got your back. Tell me to adjust my sidebar width and dip into html coding and I get a little nervous. 🙂 I figured some of you are like that too, so when I say that “if I can do this you can too” have confidence in yourself that you really can 🙂
There are many ways to set up and send newsletters. There are some plugins and then there are some websites. If you are on a self-hosted WordPress site there is actually a new plugin called MailPoet that I think I might play around with and try out: however, for now this newsletter tutorial will show you all the steps to get you up and running with Mail Chimp which is extremely popular and super easy to understand! Let’s start!
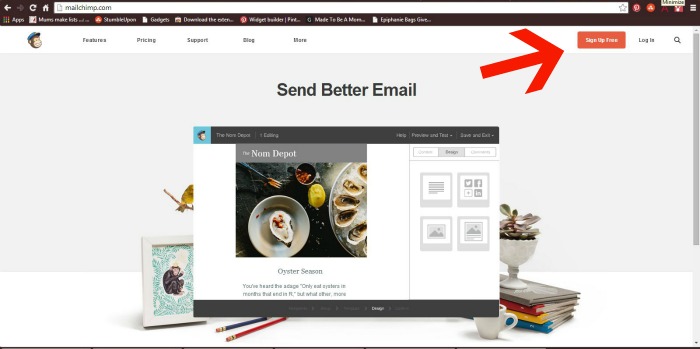
1. Sign up for Powered by MailChimp ‘>Mail Chimp and click “Sign Up for Free” ( Mail chimp allows you to send newsletters for free until you reach 2,000 subscribers!)
 2. Understand the wording!
- A form is where people will sign up to receive your newsletters. See my example right here!
- A list is a group of emails from your readers who filled out the form. ( You can have multiple lists but today we will focus on just setting up one )
- A template is the design you make for your newsletters. Once you create one template you can save it for future emails!
- A campaign is the term for an email sent to one of your lists.
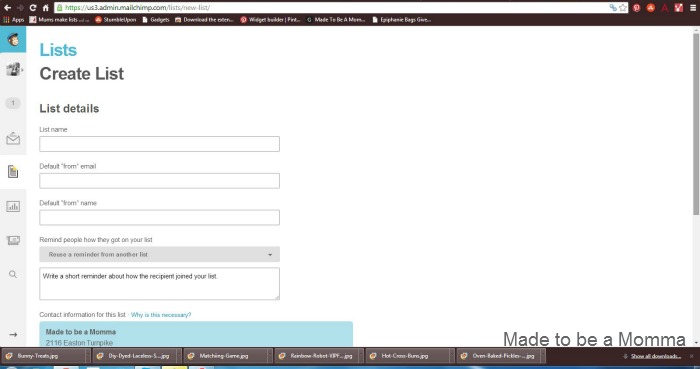
3. Make a List.
- On your Mail Chimp dashboard click on the spreadsheet icon on the left hand side of your screen. Click “Create List”
- You will be asked to fill out some information. When you’re done “Click Save.”
4. Create a Sign up form.
- Go back to your dashboard and click on “List” again. Next, click on Design Sign up Forms and then “General Forms”
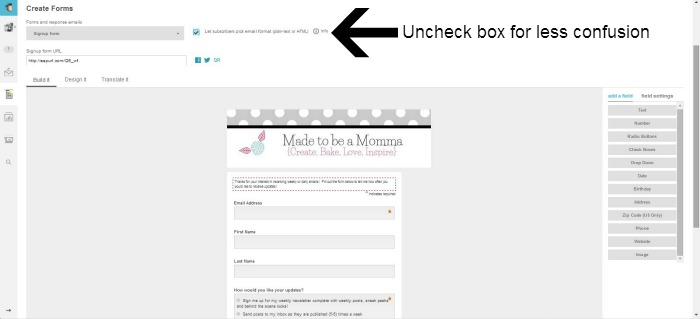
- In the “Build it Stage” you will be able to add what components to include in your form. Remember…the less information someone has to give the more likely they are to fill out the form. I have four entries they need to fill out– “Email Address”, “First Name”, “Last Name” and ” How would you like to receive your updates ( because I also have my RSS FEED linked to Mail Chimp—you would just skip that last entry.
- I also opted to un-check the ” Let Subscribers pick email format” ( plain or html) box because some readers were getting confused and didn’t know what to choose so they opted to not sign up at all! 🙁 You will find the box in the left side corner.
- Notice the box that says “Sign Up Form Url” this is a great url to have for social medias, setting up a Hello Bar and more!
5. Share your Sign up form with your readers!
- Once again, go back to your Mail Chimp Dashboard and click on “List” again. Next, click on Design Sign up Forms and then click on “Embedded forms” which allows you to copy and paste a code into a widget for your blog!
6. Create your Campaign!
- Go to your dashboard and click on the “Campaigns Icon” ( It will look like an envelope)
- On the right hand side of your screen click ” Create Campaign” and select “Regular Ol’E Campaign”
- Select with list to send the campaign to. At this point you will only have one list.
- Give your campaign a name and an email subject such as ” Made to be a Momma Newletter” you’re readers will not be able to see what the campaign name is but they will see the email subject.
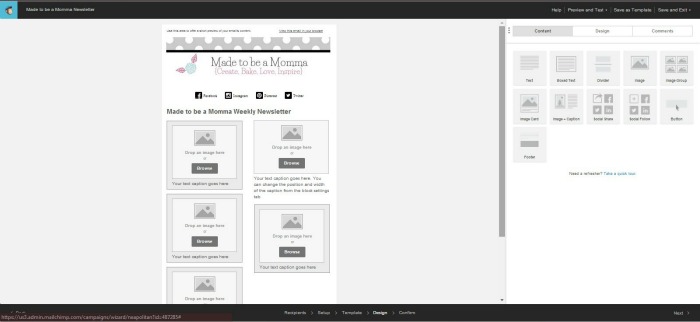
- Click “next step”. You now can choose between hundreds of pre-made campaign template to play around with or choose a “basic template” where you will start from scratch.
- To edit your campaign simply drag and drop the selections you desire and double click to edit! Have fun playing around and trying different set ups! You can insert a Campaign header, text boxes, images, social media buttons and more! Don’t forget to save your template for future campaigns for easy editing!
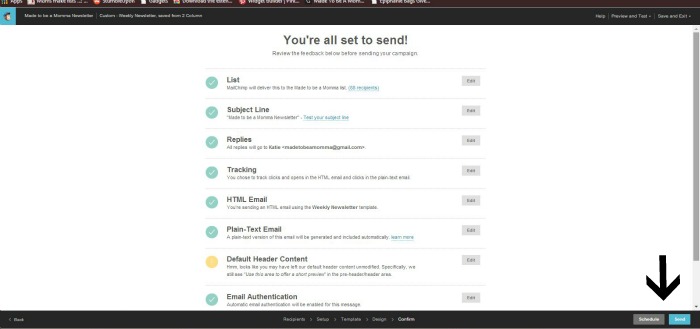
- Click “confirm” when you have your campaign just the way you want it. You can either send your email out right away or schedule it for a later time!
I apologize for the LONG post but I promised it would be easy! I like to break things down in multiple steps. It may be more reading but normally results in less confusion! 🙂 If you have any questions please don’t hesitate to ask! I’m definitely not a pro, but if I don’t have the answer I promise I will try to find it!
I hope you will stop by Made to be a Momma! I would love to have you!

For more blogging tips check out these posts!
How to set up a email signature in google mail.

How to follow the blogs you love


I’ve been trying to learn how to create a newsletter by reading countless articles. Finally, this is one I can actually understand! I would love to know more about the plugin, too. Great post!
Alli recently posted…Hit or Miss – Candy Coated Oreos
I am so glad it was easy to understand! It was a lot of information! 🙂 I haven’t researched much into the plug in yet but I plan on diving into it soon!
Katie @ Made to be a Momma recently posted…Hit Me With Your Best Shot #18
I have been thinking of making a newsletter so this is great information… Pinning this so I have it when the times come that I can sit down and figure out how and what I should do. Thanks for sharing.
Marlys (This and That) recently posted…Almost Wordless Wednesday {link-up} ~ Snow in May
You are a mind reader! On my to-do list from BlogHer “figure out how to create a newsletter”. Printing and pinning. Thanks!
Jessica (Savory Experiments) recently posted…Balsamic Whiskey Sirloin – Throwback Thursday
Excellent post! I’m working on learning MailChimp for my own newsletter as well as for a few businesses, and this was a great starting guide.
Meghan recently posted…Ways to Simplify Your Social Media Intake